

Sheet mulching is simple, natural, and effective for getting rid of your lawn and/or weed issues
Sheet Mulching is a landscaping method used to build soil, prevent weeds, and retain water. It’s sometimes referred to as a mulch lasagna because a compostable weed barrier such as cardboard, compost, and mulch are layered over lawn (or any soil area). Sheet mulching is a variation on nature’s way of building soil by accumulating and breaking down organic matter from the top down, and it creates a prime canvas for planting. We’ve recently altered our own sheet mulching process to be better in line with FireSafe Marin’s best practices for creating defensible space. With that in mind, we only use arbor mulch, we do not spread mulch in Zone 0 (0-5ft from the home), and in some cases we only spread 2” of mulch. That said, using too little mulch can actually encourage weed growth, so it is up to you to determine your fire risks and the level of weed suppression that you need on your site. A Washington State University Extension paper on using arbor mulch in the landscape recommends 4-6″ for weed suppression.
Benefits of Sheet Mulching:
- Saves 12-25 gallons of water per square foot per year compared to a traditional lawn, depending on the type of plants used. Sheet mulching the average 1,000 ft2 lawn could save between 12,000 and 25,000 gallons per year!
- Suppresses weed growth
- Reduces labor and maintenance costs
- Improves nutrient and water retention in the soil and improve soil structure
- Encourages favorable soil microbial activity and worms
- Improves plant vigor and health, often leading to improved resistance to pests and diseases
Step 1: Mow, Edge, Convert Sprinklers 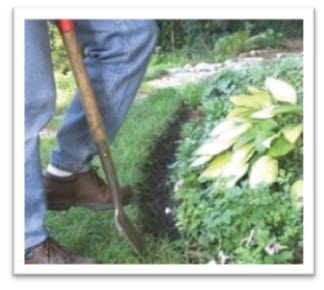
- Knock down or mow existing vegetation so that it lies flat. Remove only woody or bulky plant debris. Other organic matter can be left in place and will add nutrients to the soil.
- Edge the site, especially along hardscaping like sidewalks. This catches mulch spill over and prevents grass and weeds from reemerging around the edges. Edging should be ~5” deep (but can be more shallow around the base of trees) and should gradually slope back to the level of the rest of the landscape.
- Cap any sprinkler heads and convert one or more sprinkler heads to drip line irrigation if plants will be installed. Be sure to use a filter (often found inside the sprinkler conversion kit) and a pressure reducer to bring the pressure down to 30 psi.
Step 2: Plant Large Plants
If you have large plants (5 gal. or bigger), plant them before sheet mulching and then layer over the planting area, being careful to avoid piling compost or mulch around the trunk of the plant. Note: it is okay to sheet mulch several months before planting and then plant large plants later.
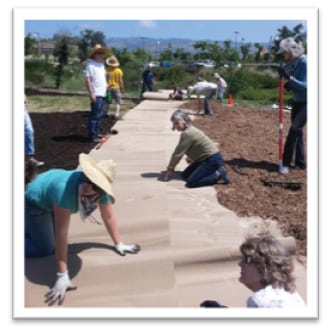 Step 3: Lay down the Weed Barrier
The first layer, an organic weed barrier, breaks down with time. The barrier should be permeable to water and air. Recycled cardboard (available from bike stores, large appliance stores, Sonoma Compost, and a multitude of other sources) is best, but a thick layer of newspaper will also work. Two or three layers may be required to achieve an adequate thickness, especially if using cardboard rolls or newspaper. However, if the weed barrier is applied too thickly, the soil can become anaerobic. The weed barrier works by blocking light, so be very careful to avoid tears or holes. Overlap pieces at least 6” to completely cover the ground without any breaks, except where there are established plants you want to save. Work in small sections so that the wind does not blow your weed barrier away before you can weight it down with compost and mulch.
Step 4: Add a Compost Layer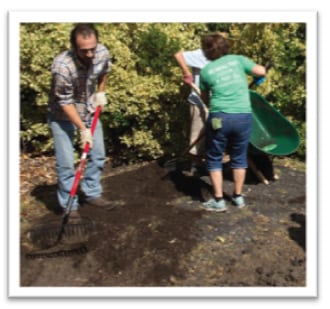
Jump start the decay of weeds and grass by adding compost or manure at the rate of about 50 lbs/100 square feet (1”-2” deep). Add any additional amendments needed, as indicated by a soil test. Optional: Soak with water to start the natural process of decomposition, especially if you’ll be planting soon.
Step 5: Add Mulch
Layer arbor mulch at least 2” thick. For best weed suppression, use 4-6″ of mulch. Leave a generous opening for air circulation around the root crown of plants.
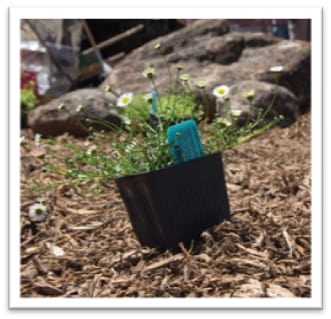 Step 6: Plant
Punch a hole or cut an X in the cardboard and place plants in the soil under the sheet mulch. Be sure the roots are fully in the soil, not just the mulch. Important note: Planting in a newly sheet mulched project can result in reemerging grass/weeds. It is advisable to predetermine your plant layout and remove the grass/weeds from the desired planting location. Alternatively, you can wait a season or more for the grass/weeds to compost before planting.