This resource is a part of our Be the Change campaign, to Grow a Garden.
Step 1: Choose the right place in your garden for your plant’s permanent home by thinking about amount of sun, spacing, water and soil type needed. Harden seedlings that have been growing indoors by placing them outside for gradually increasing amounts of time at least a few days before planting.
Step 2: Choose the right time to transplant. Cool season plants like peas or brassicas will want to be planted before the last frost, whereas hot weather plants like tomatoes are frost sensitive. Ideally, you’ll transplant in the morning of a warm, overcast day to protect your transplants from direct sunlight as they acclimate. If not,transplant in the evening when the sun and temperatures have lowered.
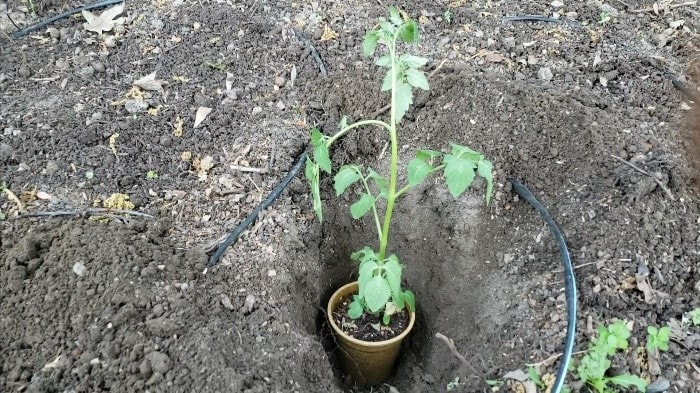
Step 3: Dig a hole for your plant –not too deep, not too shallow. Typically, you want the root crown of the transplant (where roots meet shoots) to be at soil level. Tomatoes, broccoli, kale, and cauliflower are exceptions; they like to be planted much deeper. Below is a photo showing the proper whole depth for a tomato plant.
Step 4: Saturate the soil of both the hole and the root ball with water.
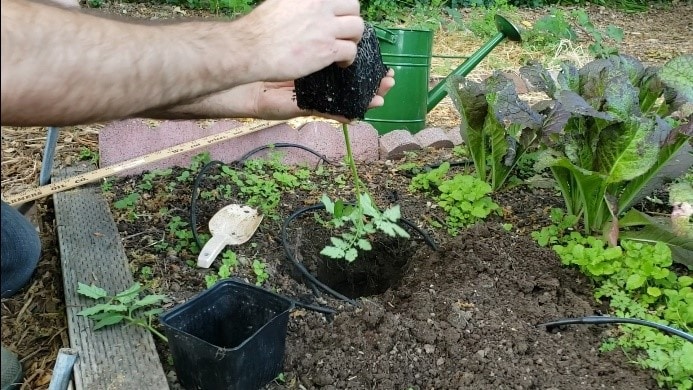
Step 5: Remove the start from its container: place your hand over the soil,with the stem in the space between your fingers, and flip the container upside down. Tap or gently squeeze the container, then lift it away. Do not pull on the plant.
Step 6: If needed, gently tease the bottom roots out of the container shape. This is sometimes called “tickling” the roots. The key is to free up the roots without breaking any.
Step 7: Place the plant in the hole. Fill in the open space around the plant halfway with soil and water again to settle the soil. Continue filling the hole with soil and then gently but firmly press the soil around the transplant. You want the air pockets to settle, but you don’t want to compact the soil.
Step 8: Water deeply. You may want to form a shallow basin around the transplant for water to collect. You may want to top dress the soil around the transplant with compost and mulch. S
Step 9: Monitor closely every day for the first few weeks and water as needed. Depending on the weather, you may need to water your transplants as often as twice a day until they become established.
*Photos by Connor DeVane


