Sheet Mulching 101

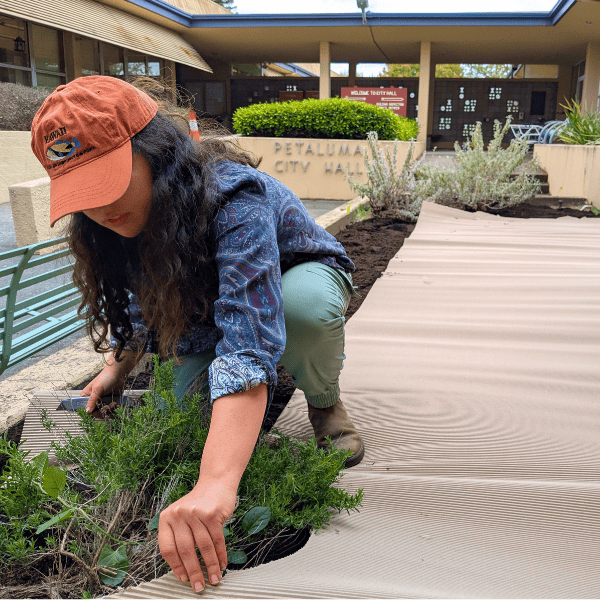
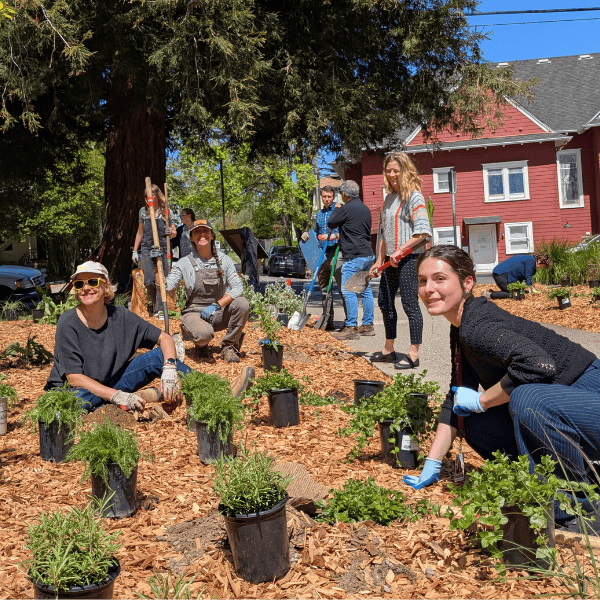
WHAT IS SHEET MULCHING?

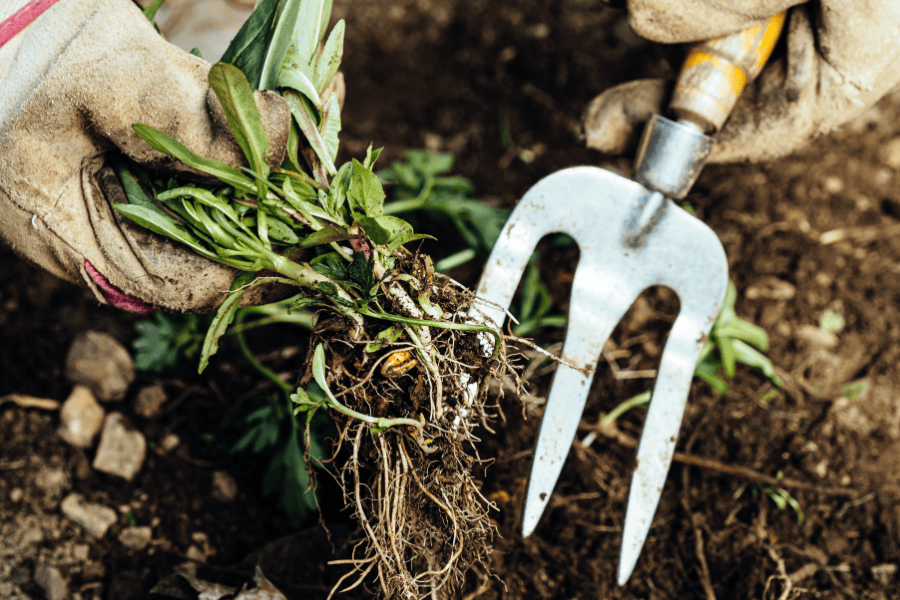
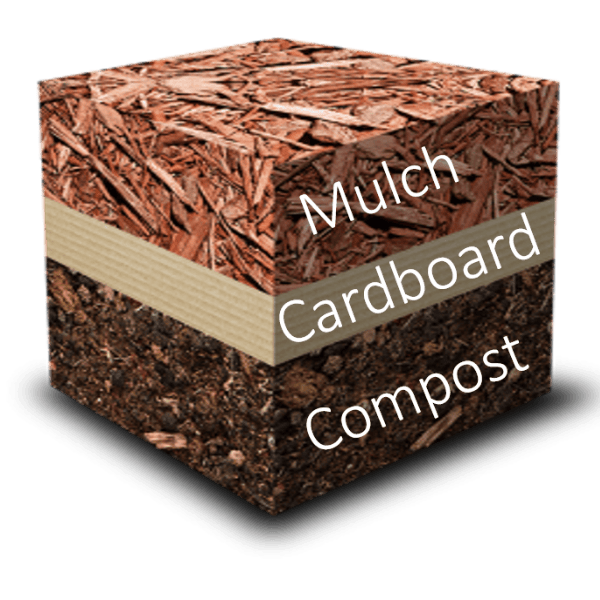
Sheet Mulching is a simple, natural and effective way for getting rid of your lawn and/or weed issues. It is a landscaping method used to build soil, prevent weeds, and retain water. It’s sometimes referred to as a “mulch lasagna” because a compostable weed barrier such as cardboard, compost, and mulch are layered over lawn (or any soil area). Sheet mulching is a variation on nature’s way of building soil by accumulating and breaking down organic matter from the top down, and it creates a prime canvas for planting.

We’ve recently altered our own sheet mulching process to be better in line with FireSafe Marin’s best practices for creating defensible space:

  • We only use arbor mulch
  • We do not spread mulch in Zone 0 (0-5ft from the home)
  • In some cases we only spread 2” of mulch

That said, using too little mulch can actually encourage weed growth, so it is up to you to determine your fire risks and the level of weed suppression that you need on your site.

A Washington State University Extension paper on using arbor mulch in the landscape recommends 4-6″ for weed suppression.

7 STEPS TO SHEET MULCH YOUR LANDSCAPE

Below, you will find detailed steps for sheet mulching your landscape. Potential tools needed include a trench shovel, rake, wheelbarrow, snow shovel or pitchfork, hand trowel, and shovel. The example images below are from sheet mulching at Petaluma City Hall!

PHASE 1: Site Preparation

STEP 1: SOLARIZE, SCRAPE, & MOW

  • Knock down or mow existing vegetation so that it lies flat. Remove only woody or bulky plant debris. Other organic matter can be left in place and will add nutrients to the soil.
  • If dealing with extra pesky weeds or grasses, consider solarizing:
    • Solarizing is the process of laying down clear plastic for 4-6 weeks during warmer temperatures (ideally during Summer) in order to increase the soil temperature to levels that kill many disease-causing organisms, nematodes, and weed seeds and seedlings. Learn more about this process

STEP 2: EDGING

  • Edge the site, especially along hardscaping like sidewalks. This catches mulch spill over and prevents grass and weeds from reemerging around the edges.
    • Edging should be ~5” deep (but can be more shallow around the base of trees) and should gradually slope back to the level of the rest of the landscape.

STEP 3: CONVERT SPRINKLERS

  • Cap any sprinkler heads and convert one or more sprinkler heads to drip line irrigation if plants will be installed. Be sure to use a filter (often found inside the sprinkler conversion kit) and a pressure reducer to bring the pressure down to 30 psi. Watch our webinar on converting your irrigation here!
    • Adding a pressure reducer to the system is important in ensuring a consistent and safe water flow that the system can handle. Without it, you run the risk of damaging the system and potentially wasting water.

PHASE 2: Sheet Mulching

STEP 4: ADD COMPOST

  • Jump start the decay of weeds and grass by adding compost or manure at the rate of about 50 lbs/100 square feet (1”-2” deep).
  • Add any additional amendments needed, as indicated by a soil test.
  • If your landscape has thick clay soil, it is worth considering how you can best incorporate the compost and loosen the soil.
    • Utilizing a tiller or a broadfork throughout the space can help increase the permeability of the soil, which is the soil’s ability to absorb water.
    • When using either piece of equipment, be careful of any underground pipes or utilities. Call 811 DIG before breaking ground!

STEP 5: LAY DOWN WEED BARRIER

  • The second layer, an organic weed barrier, breaks down with time. The barrier should be permeable to water and air.
  • Recycled cardboard (available from bike stores, large appliance stores, Sonoma Compost, and a multitude of other sources) is best, but a thick layer of newspaper will also work.
  • Two or three layers may be required to achieve an adequate thickness, especially if using cardboard rolls or newspaper. However, if the weed barrier is applied too thickly, the soil can become anaerobic.
  • The weed barrier works by blocking light, so be very careful to avoid tears or holes.
  • Overlap pieces at least 6” to completely cover the ground without any breaks, except where there are established plants you want to save.
  • Work in small sections so that the wind does not blow your weed barrier away before you can weigh it down with compost and mulch.

STEP 6: ADD MULCH

  • Layer arbor mulch at least 2” thick. For best weed suppression, use 4-6″ of mulch.
  • Leave a generous opening for air circulation around the root crown of plants.

PHASE 3: Planting

STEP 7: PLANT

  • If possible, let your sheet mulching sit for several months before planting. Ideally, sheet mulch in the fall/winter, and plant in the spring!
  • If you are sheet mulching and planting in the same day, and have plants that are 5 gallons or larger, plant them before starting the sheet mulching process. Be careful to avoid piling compost or mulch around the trunk of the plant.
  • To begin planting, punch a hole or cut an X in the cardboard and place plants in the soil under the sheet mulch.
  • Be sure the roots are fully in the soil, not just the mulch.
  • Important notes: Planting in a newly sheet mulched project can result in reemerging grass/weeds. It is advisable to predetermine your plant layout and remove the grass/weeds from the desired planting location. Alternatively, you can wait a season or more for the grass/weeds to compost before planting. It’s best to install your drip irrigation around planting to ensure plants will receive the appropriate amount of water to get established.

PHASE 4: Maintenance

Sheet mulching does not mean no more maintenance. Weeds can enter your landscape in various ways. The plus side of a sheet mulched landscape is that many of the weeds may be establishing themselves on top of the cardboard, leaving them much easier to pull than before! Removing weeds once you see them will support the health of your landscape. 

Maintenance you can expect on a sheet mulched landscape includes:

  • Seasonal pruning woody perennials and fruit trees
  • Reapplying mulch and compost every 2-3 years
  • Hand-weeding to prevent weed establishment
  • Test your irrigation seasonally to check for breaks and leaks

BENEFITS OF SHEET MULCHING

SAVES WATER

Sheet mulching saves 12-25 gallons of water per square foot of landscape per year compared to a traditional lawn, depending on the type of plants used. Sheet mulching the average 1,000 ftlawn could save between 12,000 and 25,000 gallons per year!

INCREASES WATER RETENTION

As the organic layers break down, they become part of the soil, increasing the organic matter. This creates nutrient rich humus, which acts like a sponge holding onto water and nutrients more effectively, supporting stronger plant growth.

ENCOURAGES HEALTHY SOIL LIFE

Sheet mulching creates a moist, protected environment that supports worms, fungi and beneficial bacteria. These organisms break down organic matter into plant-available nutrients and improve soil structure by creating air pockets and channels.

IMPROVES PLANT HEALTH

Sheet mulching improves plant health by enriching soil with nutrients, retaining moisture, and supporting beneficial organisms, which helps reduce plant stress and increases resilience to pests, disease, and drought.

SUPPRESSES WEED GROWTH

Ready for an effective, chemical-free method for long-term weed suppression? When well maintained, sheet mulching can suppress weed growth by creating a physical barrier that blocks sunlight and smothers existing weeds and weed seeds.

REDUCES LABOR & COSTS

While lawns can require up to weekly mows, fertilizers, and chemical weed control; sheet mulched landscapes are lower maintenance, with most plants needing only seasonal pruning to maintain health.