¿Quisieras estas técnicas y recursos en español? Haz clic aquí.
Looking for DIY resource guides? You’ve come to the right place! Find the inspiration you need to transform your yard, design your dream garden, and live your best life while saving resources. Check out our How-To Videos and Resource Guides below!
How-To Videos
Resource Guides
Vermicompost is the result of worms and other micro and macro organisms digesting organic matter. As worms eat organic matter, they leave behind worm castings. Yes, we mean worm poop! This is the product of vermicomposting – castings are full of nutrients and microorganisms. If this all gives you the heebie-jeebies, that’s totally fine! It’s not for everyone. You can always stick with basic composting.
Vermicomposting isn’t the best tool for large amounts of yard waste, but it will help you close the loop on your food waste and provide a high-quality soil additive in the process. Vermicomposting doesn’t utilize the earthworms you’d find out in your garden though. Instead, you need redworms or red wrigglers, which can churn over large portions of food waste quickly, reproduce well in confined spaces and hang out around the surface of the pile while feeding. These worms like adequate moisture and being at room temperature.

Getting started
You can buy worm bins at garden centers, but they’re actually quite easy to make at home, and you may have the materials to upcycle one already on hand. One common style of homemade worm bin uses large plastic tubs, typically the kind that can nest on top of one another. You can use wood, but avoid cedar as it has antimicrobial properties that will harm your worm community. A common size for worm bins is 24” x 18” x 18”. If you opt for plastic, you’ll need to properly ventilate by drilling holes in the sides and bottom of the bins. Here is a resource for an in-depth guide to making a worm bin.
Once you’ve got your bin, set it up so that the bottom is raised above the ground so that air can flow through. Then add bedding by filling the bin about halfway with damp, shredded newspaper and a handful of soil from your garden or a handful of finished compost. This will give the worms the grit they need to digest food; a small handful of eggshells would work too. Next, add your worms!
To determine how many pounds of worms are needed to start your bin, just divide the cubic footage in half. E.g. if you have a 4 cubic foot bin, you will need 2 lbs. of worms to start it. Worms can be purchased online, but if you’re in Sonoma County, you can buy locally grown worms at https://sonomavalleywormfarm.com/
Next, feed them! Not all materials suitable for regular compost can be fed to worms. Stick to fruit and veggie scraps, coffee grounds, eggshells, teabags, and plant trimmings. You may want to avoid citrus, onions, hot peppers, and scraps cooked in oil. Start by feeding the worms less than you will in the future. Feed them a 1:1 ratio of weight to bin size each week. In other words, if your bin size is 4 cubic feet, feed the bin only 4 lbs. of food scraps each week during the first few weeks, and try to feed the worms only once per week. Each time you feed the worms, add more bedding. You may need to add moisture, too; a spray bottle is helpful.

Harvesting
When the bin starts to fill with castings, it is time to harvest. The easiest way to do so is to “Divide and Dump.” Here is a description of this method from Sonoma Compost:
- Dig into the top layers of visible food and worms with a flat nose shovel. Remove and set this material into a wheelbarrow or container. Notice carefully where the “line” between visible food scraps and finished material begins. This is typically about 4-6” deep into the bin.
- Next, remove the “finished material”. You may notice worms in this material as well, though they are typically smaller and fewer in population than the top layer.
- Place the “finished” material in a curing box you have built for that purpose. This is typically a wooden box with ample drainage and airflow holes, raised off the ground, and with a lid.
- Leave the material in the box for two months. After this time, the compost has aged and is ready for use.
Another option is to concentrate all your food scraps on one end of the bin for a week or two. Eventually, all the worms will migrate to that side and you can scoop castings from the vacant side.

Application
You can use the castings as you would any compost – in your vegetable beds, around fruit trees, in ornamental gardens and even in your house plants. Just mix the castings with the top inch or two of soil and water in well. Some commercial bins have drip pans to catch any excess liquid that drains from the bin. It can be a good idea to replicate this with your homemade bin (especially if you keep your bin inside), both to prevent spills and also because that liquid is itself good fertilizer! You can also use castings to make excellent compost tea.
Bonus: check out this awesome webinar from Master Gardeners, the Wonderful World of Worms
Have you ever noticed that natural ecosystems like forests thrive without any added fertilizers? No one has to empty out all the waste from a forest in a green bin, either. These two traits are intimately linked, and they offer a profound lesson for your home landscape or garden. Waste doesn’t really exist in a natural ecosystem. The waste products of species in a forest, say the leaves of a valley oak, fall to the forest floor, where they are then utilized as a resource by the organisms that live in the soil. The leaves are broken down in various processes, their nutrients are exchanged, their carbon is stored, and the soil becomes healthier in the process.
That process is what we’re mimicking when we make and use compost. By composting, we can turn kitchen and yard waste into a nutrient-rich, water-wise, carbon sequestering soil additive. Healthy soil hosts robust and diverse communities of organisms, with a mind-boggling amount of different life forms, and compost helps to support that ecology. A handful of compost likely contains over 10 billion organisms! Plus, following the model of natural ecosystems, we can start to close our resource loops by keeping organic waste within the system of our garden.

Getting Started
If you aren’t sure where to start, you can just start piling organic matter! There’s no one “right” way to compost. The simplest method is a no-fuss pile, ideally somewhere out of the way and in the shade, but with easy access to and from your garden. You can also buy one of many types of manufactured bins or build a bin system yourself. Whichever you choose, the method is mostly the same.
Compost requires four ingredients: nitrogen, carbon, air and water. The easiest technique is to include roughly equal amounts of nitrogen (wet, or “green” material) and carbon (“browns”). Turning your compost pile will introduce more air, which we’ll discuss more below, and water can be added as needed – you want your pile to stay damp, but not soaking wet, like a wrung-out sponge.
Nitrogens include green waste (like grass clippings or freshly cut plant parts), food waste (including brown food waste like coffee grounds), and manure. Carbons include dried materials like wood chips, saw dust, shredded paper, and older plant waste (like dried leaves). You want to avoid any treated wood products, logs or large pieces of wood (which take a long time to decompose), any inorganic materials like metals and plastics, material from diseased plants, and waste from pets or humans. You also want to avoid including meat, bones, dairy, highly processed foods and oils, as they can both attract scavengers and make your pile stink. Whether you include these items or not, you want to bury your food scraps deep in the pile and top them with a layer of carbons to deter unwelcome visitors.
Maintenance
How you tend your compost pile is up to you. You can simply leave it to do its own magic if you aren’t in any hurry, but if you want your compost more quickly (and if you want to kill weed seeds), you can try thermophilic composting, also known as hot composting. Hot composting requires the right balance of greens and browns, proper moisture and aeration, and a minimum pile size of 3’ x 3’ x 3’. You can aerate your pile by turning it with a pitchfork, re-piling it, or even running a PVC pipe into the pile as an air intake. Manual turning is typically done once a week. If your pile is too dry, you can water it as you turn it. During wetter months, you may have to cover your pile to keep it from saturating and becoming soggy. Ideally, when you squeeze a handful of compost, some water droplets should run out. Once your pile has reached optimal size, you may want to start a new pile to allow the process of decomposition to run its course. Hot compost can finish in 2-3 months, whereas the hands-off method can take anywhere from 6 months to a year.
Like any aspect of gardening, don’t expect it to go perfectly right away! You’ll get the hang of it over time. With that in mind here is a handy troubleshooting guide from CalRecycle to help you navigate the process:

You may have learned about the carbon cycle in school, but if you want a quick refresher, check out this resource. Sequestration is the part of the cycle in which plants store carbon atoms in their biomass and in the ground. Sequestration is a big buzzword lately. That’s because it’s super important! Think of activities that emit carbon – like burning fossil fuels, deforestation, and land degradation – as a faucet filling a giant bathtub (the atmosphere of our planet). Imagine the tub is overflowing and the bathroom is flooding. This is not great for your house, to say the least! So what do you do? You turn the faucet off. But what about all the water (or, carbon) that’s left over in your house? Sequestration is the mop, or the shop vac, to safely remove all that excess.
Carbon gardening is the practice of using techniques to increase the amount of CO2 that plants pull from the air and store or sequester in the soil.. When you build healthy soil, you’re sequestering carbon; it’s that simple. The Rodale Institute claims, “If we can increase the amount of carbon we have stored in our soils around the world by just 0.4% per year, we could absorb all of the excess carbon we currently emit.”
“Soil organic carbon is the primary component of soil organic matter and provides the basis for soil fertility. It helps retain & release nutrients for plant growth, promotes soil structure, biological & physical health, and increases the buffering capacity and resilience of soils against adverse climatic events. Soil organic carbon is part of the natural carbon cycle, with the world’s soils holding roughly twice as much carbon as is found in the atmosphere and vegetation.” – Fibershed

How to Grow Carbon at Home
- Compost – mix compost into your soil, and use as a top dressing to feed plants as needed
- Cover exposed soil with mulch or cover crops
- Plant natives – native species above ground play nicely with native soil organisms below. Go with local native plants to attract local pollinators and create habitat at the same time!
- Diversify your species – the more diverse things are above, the more diverse below!
- Plant perennials and cover crops to maximize continuous living roots – roots feed carbs to soil life, an essential step of the carbon cycle
- Minimize soil disturbances like tilling, which are harmful to soil ecology and thus release CO2
- Skip the synthetic fertilizers, pesticides and herbicides – these substances can harm microorganisms in the soil and emit climate disrupting gasses
- Know what you’re working with! Test your soil
Check out this super cool tool from our friends at Landscape Analytic Solutions, the Carbon Sequestration Calculator
Healthy soil is the foundation of a healthy ecosystem, whether that be your backyard garden or a redwood forest. In some ways, gardening is more about farming soil than it is farming plants. So how can you know how healthy your soil is? One option is to have your soil tested in a lab. This is a great option for larger properties in particular – $50 is a great deal for acreage of land, but when we’re dealing with a backyard garden, it doesn’t make as much sense. Luckily, we can learn a lot about the condition of soil using our most basic scientific instruments – our senses – and a few simple gardening tools.

Head out to the garden and dig a hole that’s about 1 cubic foot – 12 inches deep, long and wide (if you have plans to dig a swale, rain garden or pond, dig your hole in that spot). Spread the soil you removed on a tarp or similar surface, and get ready to make observations and take notes on the following:
- Is the soil easy to dig or is it like concrete?
- Is it a nice dark brown indicating good organic matter or a less-than-optimal beige, gray or blue indicating low organic matter and lack of air?
- How does it smell? A scent like a nice, earthy forest floor indicates a healthy soil food web; whereas a foul or rotten egg smell may indicate poor drainage or aeration.
- Grab a handful of the soil and squeeze – what happens? Does it compact, crumble or sift through your hand? What do you think this means about how water moves through your soil?
- If you dug in an area with roots, like a lawn, do they go nice and deep or do they stop short, indicating compaction or a hardpan layer in the soil that needs to be broken up?
- Is there a variety of different insects? How many earthworms are there? Species diversity and 10 or more earthworms are good indications that the soil provides a healthy place to live
These observations alone can tell you a lot about the current conditions of your soil. Ideally your soil is easy to dig, dark brown in color, has a rich earthy smell, forms a ball with the texture of crumbling cake when squeezed, exhibits deep root growth, and hosts plenty of different insects. If your soil doesn’t yet match that description, don’t worry! Building soil health is really what gardening is all about.
The best way to nurture your soil and cultivate these conditions is to improve your soil organic matter content and maintain proper soil hydration. Check out our Carbon Gardening, Composting, Vermicompost, Drip 101 and Sheet Mulching resources for some tips.
There are a couple more tests you can perform to learn more about your soil characteristics:
The Mason Jar Test – Soil Composition

A home soil composition test is the best way to determine what your soil is made of and how it will perform in regard to water infiltration and nutrient availability, as well as what kinds of plants it will best support.
How to conduct your own soil composition test:
- Use a clear, clean, empty jar with a tight lid. A pint or quart Mason jar works fabulously.
- Fill the jar about half full of garden soil
- Fill the jar nearly to the top with water. Leave room for shaking.
- Tighten the lid and shake the jar for several minutes so that all the particles are in suspension.
- Set your mason jar soil test aside for several hours, so the particles have a chance to settle. They will separate into clay, silt, and sand layers.
- Once the particles have settled its time to read the results! Determine what percentage of each particle type you have in the jar and refer to the list below to confirm your soil type.
The basic percentages for the different soil types are:
- 30% clay, 60% silt, 10% sand = Silty Clay Loam
- 15% clay, 20% silt, 65% sand = Sandy Loam
- 15% clay, 65% silt, 20% sand = Silty Loam
As seen in the mason jar:
20% clay, 35% silt, 45 % sand = Perfect soil conditions

Percolation Test
A home percolation test is a simple way to measure how quickly your soil drains. This information can help you determine how best to amend your soil to improve aeration, what type of plants may thrive there and how often to water them.
Follow these simple steps to conduct your own percolation test:
1) Dig a 6″-12″ deep hole in your future swale area.
2) Place a ruler (or stick marked in inches) in the bottom of the hole. The measuring device should reach the top of the hole.
3) Fill the hole with water several times to saturate the soil. This may take several hours or overnight in clay soils.
4) Note the time. Fill the hole with water. When the hole is empty, note the time and calculate how long it took to drain the hole.
5) Convert this rate to minutes per inch (divide the minutes by inches- 120min/5 inches is 24min/in)
6) Find your percolation rate on the chart below.


Creating your Compass
Download PDF Here
 A good personal compass is absolutely essential in a stormy, turbulent world. A compass can help you clarify and stay true to your north star, your vision, values and strengths, especially in times of difficulty and uncertainty. Below is a set of questions to strengthen your sense of self and where you come from in order to overcome fears and limiting mindsets that keep you from being the change you wish to see. We invite you to make it your own, to notice what resonates and what doesn’t feel helpful. If the key points of your personal compass look different, change it!

Use this compass to stay aligned with your purpose and commitments or to re-center when you are pulled off path. It can be a quick reference for embodying your values or integrated into cycles of deeper reflection, like a morning routine to start your day. Or you can weave it into conversations with friends and mentors as a tool for collective uplift.
DIRECTIONS – Create the time and space to reflect on the definitions and answers to the questions below. Put on some relaxing music. Let go of your expectations. Soak in some inspiration and get started.
-
What do I value…for myself and all others?
-
Values – universal values that apply to all human beings, including yourself.
-
Ex: compassion, dignity, equity.
-
-
-
What is my Purpose and Vision?
-
Purpose – connection to who and what gives you power; your “why” is like a wind of inspiration animating your being, infusing your vision with the energy to make it so.
-
Vision – a vivid picture of the life and world you seek to create.
-
-
What are my Operating Principles?
-
Operating Principles – a guide for putting your values into practice and action.
-
Ex: from Daily Acts – take heart, be the change, nurture community
-
-
-
Who and what inspires me? Who, what or where gives me courage?
-
What are my Super Powers, my strengths?
-
What Practices and Habits give me power?
-
Practices & Habits – activities, routines or rituals that help us live our purpose, vision and values.
-
Ex: Meditation, exercise, journaling, art, connection with others.
-
-
-
What habits or practices no longer serve you? What is your “not-to-do” list?
-
-
Ex: Over-committing.
-
-
-
What tools and systems do you use to manage your time and energy towards your goals?
-
-
Ex: Tracking tools, a weekly planner, scheduling priorities, a journal
-
-

According to the Russian River Watershed Association, the Russian River watershed is a rich and diverse region of nearly 1,500 square miles of forests, agricultural lands and urban lands in Mendocino and Sonoma Counties. The mainstem of the Russian River flows 110 miles from its headwaters near Redwood Valley and Potter Valley to the Pacific Ocean near Jenner.
Throughout California, including the Russian River watershed, cities, counties, and other stewardship organizations recognize the fourth week of September as Creek Week. Every year, creek, river, and ocean clean-up campaigns take place throughout Sonoma and Mendocino Counties during Creek Week. Unfortunately, trash and debris accumulation in local waterways impair water quality, wildlife habitat, and, at times, recreation and flood capacity. Creek Week is a great opportunity to take part in activities that connect you with your community and environmental practices that help protect our creeks!
Every year, Daily Acts partners with the City of Cotati to host a Creek Week Clean-Up! However, it doesn’t have to be Creek Week for you to go on your own Creek Week Clean-Up. Below, you’ll find resources to learn about our watershed and be a steward of our local creeks year-round.


This resource is brought to you by:
Best Practices for Managing Stress, Smoke and Ash from Wildfires
Let’s face it, living in a fire ecology can be very stressful. Self-care practices are essential to build our resilience.
- Take time to rest and recover
- Deeply nourish your body with nutrient-dense foods like broths, soups, dark greens, fresh vegetables and fruits. Eat fermented foods for probiotic support.
- Avoid inflammatory foods and drinks like sugar, alcohol, fried foods, and factory-farmed meats and dairy
- Even if you are confined indoors, find ways to move your body and stretch. Put on some music and dance or shake it off.
- Practice Mind-Body Medicine techniques like breathing exercises, meditation, movement, creativity – check out these resources from socoresilience.org
- Seek out support from family, friends, local organizations, and mental health care professionals
When our region experiences fire, smoke and ash reach far beyond the fire’s footprint; we’d like to remind you of some best practices to help reduce exposure to smoke and ash:
- Keep children and pets indoors as much as possible
- If possible, keep your windows closed and run a HEPA air purifier in your home. Move the HEPA air purifier into your sleep space at night.
- Before going out, check the air quality at gov or purpleair.com (be sure the PM setting is
- If you must go out, protect your lungs with a mask – N95 or N100 are recommended. (Please note that an N95 mask with a valve to aide exhalation is not recommended to prevent the spread of COVID-19. To prevent the spread of COVID-19, cover your N95 mask with a fabric covering or change masks when indoors)
- When you return home, remove your shoes before entering your home and change your clothes and put them in the laundry
- Before going to bed, remove your day clothes, bathe or shower and wash your hair thoroughly to remove ash
Even when the air has cleared, you’ll want to take care of lingering toxics. Here are some best practices for cleaning smoke and ash in your home and car:
- Sweep and vacuum often. Vacuum floors and fabric furniture well and often (HEPA vacuum recommended).
- Wet mop hard floors and wet dust surfaces to remove ash and dust, then clean with an all-natural cleaning solution. Microfiber cloths are best for collecting ash and dust.
- Avoid toxic cleaners (such as bleach) as they can further compromise your lungs and health.
- After the fires are out, replace the air filters in your home and car.

Spread the bounty around with these low-tech methods for propagating your plants!
Cuttings
Cuttings are genetic clones taken from fresh new plant growth. For softwoods, such as lavender, sages and thymes, cuttings are best taken in late Spring (late May to early June) when growth is flexible but can be snapped when bent. For hardwoods like blueberries, fruit trees and willows, cuttings are best taken in late fall or winter when the woody stems have gone dormant.
Step 1: Cut off a section of stem with a sharp knife or shears. You want 3-6” of healthy growth on green stems, including the tips. Make a sharp, clean cut at a 45° angle about ¼” below the lowest leaf nodule.
Step 2: Remove the lower leaves so that only one or two leaves is left on the cutting.
Step 3: Dip the stem in rooting hormone (optional). If you do, dig the hole for your cutting with a pencil. This way the hormone will stay on your cutting rather than the surface of the soil.
Step 4: Pot your cutting in your chosen medium: potting mix, perlite, vermiculite, or sand.
Step 5: Give your plant time to root. This may take a few weeks. Carefully check below the soil level for root development from time to time.
Step 6: Re-pot your cutting in soil, and once it has established you can transplant in the garden.
Some Tips
-
Potting mixes and mediums are better than soil, as they drain better and are less likely to host pathogens or bacteria that could harm your cuttings.
-
Like with planting, early mornings are best.
-
Keep your cuttings cool and moist until planting. Mist the stem and leaves.
-
Keep in a bright, warm location out of the direct sun.
-
Cut and propagate way more than you think you’ll need.
-
You can make a rooting hormone with willow water – chop up willow twigs and place them in boiling water, then leave it to cool overnight. Stand your cuttings in the water for a few hours.
-
Dip the ends of your cuttings in cinnamon, which has antibacterial, antifungal, and stimulating properties.
-
You can root cuttings of certain plants by placing them in water, e.g. mint and thyme.
-
Some plants can be propagated with leaf cuttings, including many succulents.
Divisions
Division is an easier method than cutting. Division is great for blueberries, raspberries, herbs, currants and more, and best for plants more than two years old. Divisions are best done in the dormant season when plants have large carbohydrate supplies. Early spring is ideal. You can also make divisions in fall, but do so four to six weeks before the first frost.
Step 1: Dig around the perimeter of the plant and pull the whole root ball up. If the plant is too big for this, you can cut the root ball through the middle with a shovel, just re-cover half with soil once you’ve removed your division.
Step 2: Divide the roots. Rhizomes can be divided with a sharp knife.
Step 3: Place roots in water immediately.
Step 4: Dig a hole at least as deep as the plant was originally in. Settle your segments into the hole, fill with soil or compost, water deeply and add mulch.
Grafting
Most of the fruit varieties we love to eat are not true to seed, because they are hybridized. For example, the seed of a grapefruit may well sprout into one of its parent varieties: a sweet orange or a pomelo. In order to replicate the variety that we want, we have to make a clone. Because fruit tree cuttings don’t take very well on their own, we can graft them. Grafting is the process of splicing the stem of one plant onto the root stock of another. Grafting is best done at the start of spring before buds break. Different species may require particular methods, but one common technique is the veneer graft:
Step 1: Use an appropriate root stock. You may have one already in your garden, or you can buy one from a local nursery. You can find lots of information about root stocks on the internet.
Step 2: Find a healthy stem on your fruit tree with at least one bud, ideally just thicker than the branch of root stock you want to graft it to.
Step 3: Cut the stem on a 45° angle with a sharp knife or razor blade just above a leaf node. This cutting is called a scion.
Step 4: Cut an equivalent 45° angle diagonal on the root stock just below a leaf node.
Step 5: Insert the scion to the cut on the rootstock and bind the union with garden tape or twine. You can remove the binding once your scion begins to put on growth.
A Few Tips:
-
Watch out for suckers! If the root stock puts on new growth, be sure to prune it away as soon as possible. You want water and nutrients directed to your scion, not the root stock.
-
You can graft multiple scions of different species and variety onto a single root stock. Imagine an almond root stock with nectarines, plums, and peaches all growing on it!
This resource is a part of our Be the Change campaign, to Grow a Garden.
Step 1: Give thanks! Harvesting is both a give and take relationship, so much of what you collect from your garden depends on what you put in. Give thanks for the bounty in whichever way makes sense and be sure to share when you have excess.

Step 2: Reap what you sow! Harvest leafy greens such as kale, lettuce, and swiss chard by using a sharp knife to cut off the outer leaves at the base of the plant. Leave enough leaves so the plant can continue regenerating. Harvest perennial fruits by gently twisting fruit from stem. If this is not possible, use a sharp pair of scissors to cut fruit just above stem.Harvest flowers by cutting or pinching just below the flower head. For herbs, harvest the stalk for easier drying.

Step 3: Process your bounty! Separate roots such as turnips, beets, carrots, and radishes from their leaves when storing. This prolongs the life of the root. Most fruits and vegetables stay fresher longer if you wait to wash them until just before eating. Store in refrigerator (with the exception of tomatoes and strawberries) until you’re ready to prepare. When drying herbs and edible flowers for medicine, tea or seasoning, be sure to provide enough air circulation to avoid mold and keep out of direct sunlight to retain potency. Once dry, store herbs in glass jars or plastic bags and use within one year for best flavor.

Step 4: Enjoy your harvest! Get creative by steaming or sauteing beet and turnip greens. Radish greens are edible, but their texture makes them less desirable. Carrot greens are also edible and can be enjoyed in a pesto or chimichurri sauce. Add dried herbs and edible flower petals to table salt for a more exciting seasoning, or make your own tea blend from what you find in your garden.
Grow a Row and Share Your Extra Yield with Those in Need
In these uncertain times, we could all benefit from some mutual aid. If your garden is already thriving, you can harness that abundance for solidarity with your community! Do you have some extra space on your site? Plant a row or bed of food crops to donate to community members experiencing food insecurity. Do you have more apples than you could possibly hope to eat, process, or even harvest? Share the bounty! You’ll be helping your neighbors, lightening your own processing load, and maybe making some new friends in the process. There are many ways to distribute a share of your produce:
- First, you can share your bounty directly with your neighbors! From a proper social distance, of course. You can either drop food directly to your neighbors’ homes or put out a FREE box or stand in front of your house. You can also utilize resources like Nextdoor, CropMobster, and Craigslist to find neighbors who want some of the surplus

If you’re looking to ripple your produce out further beyond your neighborhood, check out this AMAZING resource from our friends at Petaluma Bounty, which can direct you to organizations around Sonoma County and beyond who will help your excess produce find its way to folks in your community who need it.

Got some extra space in the garden? Have some land that you aren’t going to be working?
- Grow a Row of produce specifically to be donated to your community
- Lend out your space to someone who doesn’t have access to a gardening site. Post on Nextdoor, Cropmobster or social media to find someone to partner with
- When the time comes, plant a winter garden, as winter is when food pantries are most in need of donations
Know of any other community food drop-off sites or collection groups that you didn’t see on that resource? Let us know! Send an email to [email protected]
Model Your Site, Educate and Share Resources with Your Community
Are your thumbs already a rich, deep green? Are you a water-wise wizard, a habitat-creating hero, or a conservation champion? Maybe you picked up some of these skills through our past Community Resilience Challenges! If any of the above apply to you, we invite you to take the next step with us and spread the goodness out amongst your community by becoming a Resilience Hub. You can be a guide to those just getting started with resiliency techniques, and by doing so you’ll build community with them, in turn strengthening each other’s resiliency! Stackin’ functions, baby.
")
Now, in these times of COVID-19, being a Resilience Hub requires some creativity. If we’re meant to stay home, we can’t be inviting the whole county over for a garden tour! Figure out what the needs and interests of your community are, and then ask yourself what makes sense for your home site. Once you’ve registered to be a Resilience Hub under the Grow a Garden section of our Be the Change Campaign, you can:
- Open a Garden Gallery: Got a garden in your front yard? Put up a Resilience Hub sign and invite your neighbors to peruse your oasis
- Propagate Sage (Advice): Set up out a socially distant Advice Booth in front of your home, where your neighbors can come and ask you gardening and resiliency questions
- Chalk it up: Write messages on the sidewalk in front of your home. Keep it dynamic! You could draw common plant guilds, share your favorite Sauerkraut recipe, or write out IDs for all the nearby plants
- Create a Curbside Commons: Put out a free stand where you can share extra produce, starts, seeds and more
- Phone It In: Set up a question-and-answer session on Zoom. Bonus points – link up with other Resilience Hubs to pool your knowledge
- Spill the Beans: Let your community know what you have to offer! Post on Nextdoor, Cropmobster, or social media to tell your neighbors what you want to share with them
- Spin a Yarn. The power of storytelling can’t be overstated; let those who are just dipping their toes in the water know how you ended up treading the waters of resilience like an Olympic synchronized swimmer. Some of these concepts seem overwhelmingly daunting until we can see how others have navigated the process. Share your story with us so we can ripple it out to the broader community
Be creative! See what ideas you can germinate, and let us know what you come up with!
This resource is a part of our Be the Change campaign, to Grow a Garden.
Step 1: Choose the right place in your garden for your plant’s permanent home by thinking about amount of sun, spacing, water and soil type needed. Harden seedlings that have been growing indoors by placing them outside for gradually increasing amounts of time at least a few days before planting.
Step 2: Choose the right time to transplant. Cool season plants like peas or brassicas will want to be planted before the last frost, whereas hot weather plants like tomatoes are frost sensitive. Ideally, you’ll transplant in the morning of a warm, overcast day to protect your transplants from direct sunlight as they acclimate. If not,transplant in the evening when the sun and temperatures have lowered.
Step 3: Dig a hole for your plant –not too deep, not too shallow. Typically, you want the root crown of the transplant (where roots meet shoots) to be at soil level. Tomatoes, broccoli, kale, and cauliflower are exceptions; they like to be planted much deeper. Below is a photo showing the proper whole depth for a tomato plant.
Step 4: Saturate the soil of both the hole and the root ball with water.
Step 5: Remove the start from its container: place your hand over the soil,with the stem in the space between your fingers, and flip the container upside down. Tap or gently squeeze the container, then lift it away. Do not pull on the plant.
Step 6: If needed, gently tease the bottom roots out of the container shape. This is sometimes called “tickling” the roots. The key is to free up the roots without breaking any.
Step 7: Place the plant in the hole. Fill in the open space around the plant halfway with soil and water again to settle the soil. Continue filling the hole with soil and then gently but firmly press the soil around the transplant. You want the air pockets to settle, but you don’t want to compact the soil.
Step 8: Water deeply. You may want to form a shallow basin around the transplant for water to collect. You may want to top dress the soil around the transplant with compost and mulch. S
Step 9: Monitor closely every day for the first few weeks and water as needed. Depending on the weather, you may need to water your transplants as often as twice a day until they become established.
*Photos by Connor DeVane
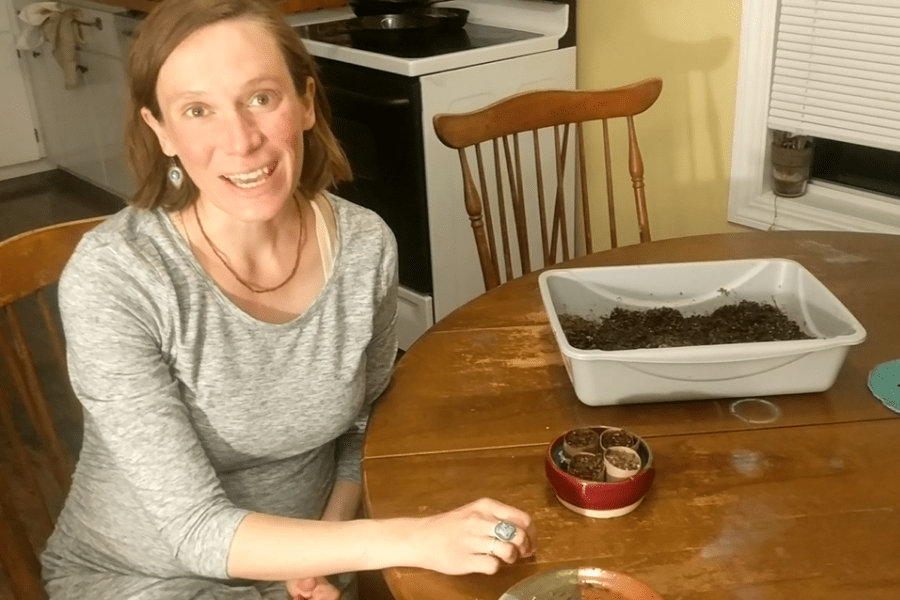
Step 1: Determine what type of container you will use. Any container will work as long as it has good drainage. I’ve used toilette paper rolls or old plastic containers with holes poked in the bottom.
Step 2: Prepare label with plant name and date. You can use popsicle sticks or yoghurt containers cut in strips, or other creative household items.
Step 3: Place your seeds on a plate. It’s best not to touch the entire seed packet with wet hands as moisture could cause the remaining seeds to begin the germination process.
Step 4: Fill containers with soil (see recipe below). The important components of seed-starting soil are that it retains moisture, has good drainage, and isn’t too nutrient rich(you wouldn’t want to seed into 100% compost). Remember, your seed contains all the energy it needs to germinate!
Seed Starting Mix
- 2 parts compost
- 1 part coir (coconut fiber) or well-rotted leaves
- 1 partperlite
Step 5: Plant seeds at a proper depth. Most seed packets will provide instructions, but a good rule of thumb is to plant at a depth of 3 times the width of each seed.
Step 6: Water seeds and place in bright window. Seeds need consistent moisture to germinate so check on your containers daily.
*Note: While many seeds don’t require light to germinate, your starts will need lots of light once they sprout.
*Photo credit: Annie Silverman

We love to mix things up in our gardens, but there are a number of plants we tend to bring into a lot of our sites. If it ain’t broke, don’t fix it! Here are a few examples of plants we keep coming back to:

Yarrow: Achillea millefolium
This dependable native has soft, feathery leaves shaded by umbrellas of tiny flowers, which bloom all summer and into fall. It is great for pollinators, accumulates soil nutrients, and provides a number of medicinal uses. It also comes in a variety of colors to match any landscape. To ensure a full life and tidy appearance, trim back as needed, usually after bloom.
Plant Size: 1-2′ tall and wide


California Lilac: Ceanothus spp.
A native shrub available in every shape and size. Waxy evergreen leaves are adorned with dense puffs of lilac colored flowers in early spring, providing essential pollinator habitat when not much else is blooming yet. Great as an accent, groundcover or for screening. Place where it can express itself as it does not favor pruning. Variety shown here is ‘Joyce Coulter’.
Plant Size: 3′ tall and 5′ wide


Tricolor Sage: Salvia officinalis
A beautiful variegated version of culinary sage, which can be used either fresh or dry. Grows in low, spreading clumps and sends up purple flowers in spring and early summer, which are a favorite for many pollinators. This plant makes a great border for any garden, especially when mixed with other herbs. It is prone to rot if it stays too wet, so will last the longest in well drained soil.
Plant Size: 1-3′ tall & wide


California Fescue: Festuca californica
This small grass brings lovely blue-gray shades to the garden. A native that is very low maintenance, although fairly short lived. Group in mass for the best effect. It provides great habitat for beetles and seeds for birds. To promote a longer life, clean dead foliage by hand as needed, usually about twice a year.
Plant Size: 2-3′ tall & wide


CA Grey Rush: Juncus patens
An evergreen native that forms erect clumps of deep blue-green, round spears. One of the best plants for rain gardens, it thrives in boggy wet soil but is also very tolerant of dry summers. Looks best with occasional deadheading of old growth, and doesn’t mind a little irrigation in the summer either, although it will survive without once established.
Plant Size: 12-18″ tall & wide

Beardtongue: Penstemon spp.
Evergreen foliage and nearly year-round blooms in many enticing colors, magenta to electric blue, make this a favorite filler plant. The tubular flowers mean that hummingbirds love it! Once established, it will prosper in low fertility soil with little summer water and can take full sun to partial shade.
Plant Size: 2′ tall and wide


Thyme: Thymus spp.
Elfin-sized leaves and stems weave a springy mat that does well as a lawn subsitute. Taller varieties are best for cooking, although creeping varieties taste okay too. Flowers form a lovely summertime icing of purple, pink or white and are loved by bees. For the plant to live its longest, trim back 1/3 per year after bloom.
Plant Size: 2-3″ tall and 1′ wide
Sticky Monkey Flower: Mimulus aurantiacus
This native is a spring and summer show stopper, with loads of salmon-orange flowers attracting pollinators. A perennial evergreen with dark waxy leaves that benefit from occasional pruning to refresh growth. Hybrid varieties sometimes maintain fuller foliage with less trimming. Also a favorite for hummingbirds and bees.
Plant Size: 2′-3′ tall & wide


Purple Spreader Verbena: Verbena x hybrid
A low maintenance and high impact groundcover blanketed with bright purple flowers through most of the early spring and late summer. This plant also comes in a variety of other colors, however purple is a favorite for butterflies. Very low maintenance, with some varieties like Superbena not even needing deadheading.
Plant Size: 6″ tall and 2′ wide
California Fuschia: Epilobium Canum
Like little firecrackers, these orange-red flowers explode over sage foliage throughout summer and early fall, attracting hummingbirds and bees. Can be kept attractive with light pruning as a groundcover. Nice when coupled with purple flowered perennials.
Plans Size: 1′ tall x 2′ wide


Seaside Daisy: Erigeron glaucus
This sweet little evergreen native has flat, pink, daisy-like flowers that the bees love to take a nap in. Low-growing and tolerant of poor soils, it provides an excellent groundcover. Can take some shade in more inland climates. Blooms nearly year round.
Plant Size: 1′ tall x 2′ wide
Deer Grass: Muhlenbergia rigens
Very low maintenance native grass, provides seed heads for birds and cover for beetles, lizards, etc. Forms a fountain creating structure and seasonal interest year round after all perennials have floomed.
Plant Size: 1-2′ tall & wide.


Sedges: Carex spp.
Most sedges grow as cascading mounds of narrow leaves that can be many shades of green to coppery orange in the summer. They grow well on the borders of rain gardens and can take seasonal wet conditions. Provides good hide outs for beneficial insects and beetles!
Plant Size: 2′ tall & wide
Cleveland Sage: Sativa clevelandii
This native shrub has grey-green leaves and whorls of lavender flowers in summer that are a favorite for hummingbirds. Strongly scented. Good for use as an accent plant or to tie in sage look through garden. Easy to grow and maintain, simply needs deadheading post flowering.
Plant Size: 3-4′ tall & wide


Coffeeberry: Rhamnus californica
A dense and round evergreen native shrub with big berries that resemble coffee. The fruit contains laxative properties and has long been used medicinally but IS NOT EDIBLE. Provides a wonderful shape and density for a hedge or screening. Can handle light pruning for shaping.
Plant Size: 6′ tall & wide
Toyon: Heteromeles arbutifolia
This California native is also known as Christmas berry for its evergreen foliage and bright red berries in the winer. Low maintenance and great near a window for bird watching, as its berries are a favorite winter food for wildlife. Fun fact: this plant is the namesake of Hollywood!
Plant Size: 10-20′ tall


Bush Anemone: Carpinteria californica
This evergreen California native shrub boasts beautiful white flowers with yellow centers, making it a great replacement for the thirsty Camellia. Drought tolerant and hardy, it can thrive in full sun to part shade, making an excellent screen.
Plant Size: 6′ tall & wide
Manzanita: Arctostaphylos spp.
These native evergreens have twisting mahogony red to brilliant orange branches and delicate clusters of bell shaped flowers that are a big hit with bees. Prefer well drained rocky soils, but are very low maintenance once established. Can be found in upright or trailing varieties.
Plant Size: 1-12′ tall & 4-10′ wide


Currant: Ribes spp.
A wandering deciduous perennial that can persist in part sun to shade, currants are a great option for understory. Attractive cascades of flowers come in many colors from red and pink to yellow, producing sweet-tart fruit, ripe in midsummer. Upright, sparse, vase-like form that needs pruning to stimulate new growth post fruiting.
Plant Size: 6′ tall & 4′ wide

Pineapple Guava: Feijoa sellowianna
A very low-maintenance evergreen shrub with showy edible flowers and gray-green foliage. Provides edible fruit with unusual tropical flavor. Nice multi-functional replacement for box hedges, or can be trained as a tree or for screening.
Plant Size: 6-8′ tall & wide


Persimmon: Diospyros kaki
Persimmons are a winter delight. Two types: apple shaped fruit (fuyu, seen here) can be eaten when still crunchy, while acorn shaped varieties (hachiya) should be eaten when very soft and ripe, almost gelatinous, or cooked or dried. Has brilliant seasonal color. Hardy and not prone to disease.
Plant Size: 20-30′ tall
Pomegranate: Punica granatum
Pomegranates can really handle drought once established. Large luscious fruit are ripe in late fall, early winter. A deciduous shrub, new growth appears bright red orange at first, then turning green, making it a great accent. Full in form it can be pruned up as a tree or kept as a smaller shrub.
Plant Size: 8-12′ tall


Fig: Ficus carica
A beautiful deciduous tree with twisting form, can be used as an accent in a garden providing deep shade with large palmate leaves, or bare sculptural trunk in winter. Figs can bear two crops of sweet fruit/year (depending on variety) and are easy to care for. Can be kept small with pruning but will get large if allowed.
Plant Size: 8-30′ tall
Strawberry Tree: Arbutus maritima
This evergreen tree displays bright red peeling bark that adds accent to the garden. Strawberry shaped berries are pretty and fun to eat. The tiny bell shaped flowers attract pollinators. Can be pruned to single or multi-trunk.
Plant Size: 15-20′ tall


Citrus: Citrus spp.
Citrus trees are frost sensitive, but will thrive against a warm, south-facing wall. Beautiful evergreen foliage, strong-smelling flowers, and winter-ripe fruit make them a nice landscape specimen, especially by a front door or pathway.
Planst Size: 8-30′ tall
Yerba Buena: Satureja douglasii
The crushed leaves of this native mint smell incredible! A low-growing ground cover, whose tendrils do not invade the garden like a true mint. Great for use understory or along rocky pathways as it can handle light trampling. Wonderful in tea.
Plant Size: 3″ tall by 2′ wide


Olive: Olea europea
This Mediterranean native adds both form and function to the garden with its evergreen sage leaves. Found in many varieties including small shrubs. The fruit is edible if processed and can be a little messy near a street or sidewalk. Great for screening, beautiful in the wind or to create a shady spot.
Plant Size: 4-30′ tall
Elderberry: sumbucus spp.
This charismatic CA native is drought tolerant but doesn’t mind having its feet wet. The berries can be eaten raw in small quantities (can cause stomach upset), but are delicious and medicinal when cooked into syrup, wine, jam, or tincture. While this plant contains many medicinal qualities, the leaves, green fruits and stems are toxic when eaten. This is also a great wildlife plant, attracting pollinators and birds to its 10-15’ tall, shrubby upright form.
Plant Size: 10-15′ tall and wide


Loquat: Eriobotrya japonica
This drought tolerant evergreen tree produces fruit that look and feel like apricot and that taste like a cross between cantaloupe and cherry drizzled with lime. With flowers in fall or early winter, fruits come as a welcome addition to a late winter diet. For those who are space limited, this typically small tree can also be planted in large containers.
Plant Size: 10-25′ tall and wide
A Seasonal Approach
At Daily Acts we believe that a water-wise garden can still serve a variety of functions, providing habitat, medicine and food in addition to beauty. While the term water-wise garden has become synonymous with low maintenance, seasonal work is still required to keep these plants healthy and looking good year round. Here are some basic tips for tending to a diverse water-wise garden
Winter
- Good till the last harvest: enjoy picking the last of the ripening winter garden before turning these areas over for cover crops or laying fallow. Enjoy those cold winter months preserving your bounty.
- Weeds be gone: of course with the rain comes the weeds – be sure to get them when they are small to keep them from out-competing new plants for nutrients and other resources.
- Plant those perennials: this is the best time of year for planting drought tolerant perennials and native plants. It is the dormant season for most plants which will keep them from experiencing any transplant shock to their roots or water loss from there leaves with changing temperatures. It also allows you to cut down on watering by taking advantage of the rain.
- Broadcast seeds to every corner: many annual cover crops and wildflowers have a better chance of survival in the garden if they start there. Sow seeds after the first few heavy rains to ensure that there is ample moisture in the soil to support their root development, and be sure to provide supplemental watering in periods of drought.
- Mulch, mulch and more mulch: can be used to help with weed suppression, and can also help retain moisture in the soil. Be sure to keep it away from the crowns (where the roots hit the shoots) of the plants to avoid rot, especially for plants that die back annually.
- Fertilize and nourish: Remember to spread fertilizer around the drip line of your fruit trees with a nitrogen rich source during the winter. This is especially important for citrus which is just beginning to set fruit.
- Deadhead dance: move to the beat of the garden while performing this beneficial service to old flower stalks, grasses and fern fronds etc. While most deadheading is done in the fall, many flowers and seeds can provide much needed food in early winter for birds and other wildlife. Remember, much of what you prune can be propagated from cuttings, be sure to pot some up to use in your garden or share with friends. Any portions of the plant that are not good for propagation can be left on the ground to compost and add to the mulch layer.
- Fruit trees need a haircut too: most of our backyard fruit trees benefit from pruning while dormant, with the exception of Cherries and Apricots who require summer pruning. Winter prune to stimulate side shoots and round out the development of your primary and secondary canopies. Be sure to tend to your winter pruning before it gets too hot and the trees begin to break bud.
- Take notes: be sure to write down the little surprises and successes you had in the garden this fall, what species or varieties worked well where, in order to help you form a plan for next time.
Spring
- A little bit of water: it is always good to check on new additions to the garden and provide supplemental water, especially if we move from a wet winter into a dry spring.
- Make the beds: once spring has officially sprung and frost is a thing of the past, it’s time to get those planting beds ready for annual food crops. Amend with compost, worm castings, or turn under cover crops to release nutrients into the soil.
- Sow seeds of love: dust off those envelopes filled with yummy veggie and fruit seeds and begin propagating the seedlings that will bring your summer garden to life. Begin planting starts after the last frost, especially important for tomatoes, and any quick cycle annuals like peas and salad greens. Remember to add some mulch to exposed soil to help retain moisture in the soil, rice straw, coconut coir or shredded bark can work.
- Warm weather weeding: with sunshine comes the promise of more weeds in the garden. Get them before they flower and set seed to return the following spring.
- Add a little mulch here, a little mulch there: as the mulch breaks down throughout the season, it provides more nutrients in the soil which can also cause a flush of weeds. It is always good to replace broken down mulch in problem areas by adding a few more inches on top. Adding a new layer of mulch will also help hold in moisture in the soil to make watering events count.
- Take a little off the top: tip-prune shrubs to encourage bushing or shape and train vines while new growth is still tender and agile. Removing dead branches on shrubs and trees will provide more air circulation and encourage new growth. Be sure to prune during dry periods, as you will be leaving a wound behind that is prone to fungal infections if left wet.
- Thick and thin: if you are fortunate enough to have a productive season with an abundance of fruits on the tree, it is important to thin out excess fruit to allow for proper development and subsequent deliciousness to occur. Of course this also prevents the fruit laden limbs from breaking before it’s ripe.
- Enjoy the flowers: The first blooms in the garden are like a colorful feast after a desolate winter. Spend some time observing your hard work and noting what plants attract the most wildlife – they’ll be enjoying the feast too
Summer
- A little more water: most natives will require supplemental watering throughout their first year in a garden. After they have established a good root system most drought tolerant perennials can persist with very little water in the dry months. However, if you want to extend the blooming season for some plants, continued watering will help create a long colorful summer. Potted plants may also dry out quicker if your garden gets summer sun so be sure to water thoroughly.
- Deadhead dance: remove the old flowering stalks of spring time perennials. Cutting back some long flowering perennials species will encourage additional blooms and provide more color and food sources throughout the summer for our pollinators and nesters.Remember, much of what you prune can be propagated from cuttings, be sure to pot some up to use in your garden or share with friends. Any portions of the plant that are not good for propagation can be left on the ground to compost and add to the mulch layer.
- Fruit trees need a haircut too: most of our backyard fruit trees benefit from summer pruning to help control height and canopy size. This is especially true of Cherries and Apricots who do not respond well to winter time pruning.
- Thick and thin: if you are fortunate enough to have a productive season with an abundance of fruits on the tree, it is important to thin out excess fruit to allow for proper development and subsequent deliciousness to occur. Of course this also prevents the fruit laden limbs from breaking before it’s ripe.
- Good till the last harvest: enjoy picking the last of the ripening summer garden before turning these areas over for cover crops or laying fallow for the winter. Get ready for canning, pickling and preserving fun in fall.
- S.O.S (Save Our Seeds): if you want to expand your plant populations in your garden or establish a ‘seed bank’ you can collect seeds to spread around the garden after winter rains or store for later propagation.
- Fertilize and nourish: if you have any potted plants or raised beds, this is a good time of year to amend the soil with additional fertilizer. Slow release is best as it breaks down over time, offering the plant additional nutrients when needed. Remember to spread fertilizer around the drip line of your fruit trees with a nitrogen rich resource throughout the growing and ripening season.
- Take notes: be sure to write down the little surprises and successes you had in the garden this season, e.g. what species or varieties worked well where, in order to help you form a plan for next time.
Fall
- And a little more water: continue to provide supplemental water until the fall rains arrive. As temperatures cool this will be less and less.
- S.O.S (Save Our Seeds): continue to collect late ripening seed for sowing next season. Be sure to clean seed, removing any excess chaff (leaf or flower parts) that provides the perfect environment for rot in storage or if direct sown into the garden when the rainy season arrives.
- Clean up: late blooming perennials by cutting out old growth, old blades of grass and fern fronds to encourage new growth next spring and provide air circulation around the crown during the rainy season.
- Sow seeds of love: dust off those envelopes filled with yummy veggie and fruit seeds and begin propagating the seedlings that will bring your winter garden to life. Remember to add some mulch to exposed soil to help retain moisture in the soil; rice straw, coconut coir or shredded bark can work.
- Make the beds: now that you have harvested your summer annual garden, it’s time to get those planting beds ready for winter food crops. Amend with compost, worm castings, or turn under cover crops to release nutrients into the soil.
- Fertilize and nourish: if you have any potted plants or raised beds, this is a good time of year to amend the soil with additional fertilizer. Slow release is best as it breaks down over time, offering the plant additional nutrients when needed. Remember to spread fertilizer around the drip line of your fruit trees with a nitrogen rich resource throughout the growing and ripening season.
- Thick and thin: if you are fortunate enough to have a productive season with an abundance of fruits on the tree, it is important to thin out excess fruit to allow for proper development and subsequent deliciousness to occur. Of course this also prevents the fruit laden limbs from breaking before it’s ripe.
- Prepare for perennial planting season: by removing weeds, identify areas where more plants are needed, refer to your notes for successful candidatesand have fun shopping!
Step 1: Determine placement of pot. Most fruits and vegetables need 8 hours of sunlight to thrive.
Step 2: Assess how your pot will drain. It is essential that your pot has either drainage holes or is made out of a permeable material. *Roots will rot and plant will die without drainage
Step 3: Fill pot with potting soil. See recipe below or purchase soil. You can try using soil from your backyard, but you may experience drainage problems.
Container Gardening Mix for Annual Vegetables
+ 2 parts compost
+ 1 part coir (coconut fiber) or well-rotted leaves
+ Handful of perlite
Step 4: Either direct seed or transplant into pot.
Step 5: Create watering schedule. It’s easy to overwater pots. Seeds need to be kept moist to germinate. For established plants, the top 2-3 inches of soil should be dry.

*Photo credit: Liz Platte-Bermeo
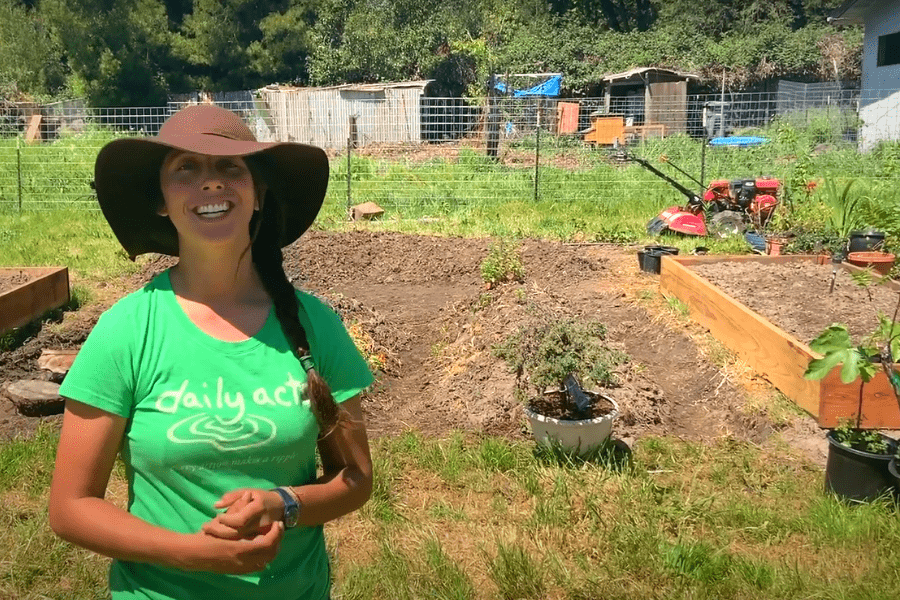
Step 1: Site assessment: Choose a site for your food garden space that receives 8 hours of sunlight, has good drainage, and does not have invasive weeds.
Step 2: Clear existing vegetation.
Step 3: If soil is dry, water area you plan on converting to planting space the night before. The area should be moist but not muddy the next day.
Step 4: If you’re breaking ground for the first time, you may need to till compacted soil. If possible, loosen soil with a broadfork instead of a tiller to preserve soil structure. Mix in compost.
Step 5: Cover beds with rice straw until you are ready to plant. Covering soil retains moisture and moist soil is a great breeding ground for beneficial bacteria and fungi that will improve soil quality. Rice straw is guaranteed not to harbor any perennial grass seeds that could become weeds in your garden.

*Photo credit: Annie Silverman
How to Determine Watering Needs and Irrigation Programs
There are a number of factors that influence how long and how often we water our landscapes. Knowing a bit about your plant type, local climate and soil type will help you determine watering needs for optimal health and appearance. The leaf structure and native habitat of a plant are one of the key ways to tell how much water it will need. Plants with large, glossy leaves are likely to have evolved for shady, wet climates, whereas small, fuzzy, deeply lobed, or succulent leaves are all plant adaptations to help cope with dry, sunny weather. Local climate patterns, and even micro-climates within your landscape,will influence how much water needs to be supplied at different times of year. Your soil type will influence the rate at which water is applied to a landscape in order for it to infiltrate the root zone and encourage new growth without causing rot. The following sections describe each of these factors in more detail.
WUCOLS Plant Selection for Water Efficiency
The Water Use Classification of Landscape Species (WUCOLS), is a system that matches water supply to plant needs in an effort to increase irrigation efficiency and maintain landscape health and appearance. WUCOLS IV provides evaluations of the irrigation water needs for over 3,500 taxa (taxonomic plant groups) used in California landscapes. To look up the plant factor and watering needs for a particular plant visit http://ucanr.edu/sites/WUCOLS/Plant_Search/
Four categories of water use have been determined:
- High – contains species requiring the greatest amount of water during the summer months to maintain acceptable health, appearance, and growth, such as five-finger fern (Adiantum aleuticum), species that grow in deep shade or in creek banks with ‘wet feet’.
- Set irrigation program to water between 4-7 days each week during hottest summer months – assign a plant factor between 7-9

2. Moderate – includes plants such as cone flower (Echinacea spp.) that require routine moisture. Many eastern American species are in this category as they are used to summer rain. Most fruit trees are also in this category.
-
- Set irrigation to water up to 3 days a week during hottest months– assign a plant factor between 4-6

3. Low – these plants are considered to be water conserving (relative to a lawn) because they perform well with small amounts of irrigation water through the summer. Plants from other Mediterranean climates, such as strawberry tree (Arbutus unedo), and CA natives that are found in shadier habitats are often in this category.
- Irrigate 2 days a week, may require more depending on how established the plants are– assign a plant factor between 1-3

4. Very Low – are classified as needing no irrigation except during years of below average rainfall for the region, such as matilija poppy (Romneya coulteri). Many California native plants fall into this category, but may still need weekly watering during the first year of establishment.
-
- Irrigate 1 day a week during establishment, increase during hottest months for the first year or two.

Soil Infiltration Factors
Your soil type indicates both how quickly water can infiltrate the root zone and how widely it will be distributed. For recommendations on emitter flow rates based on soil type see below:

Sand is an extremely porous substrate that allows quick water infiltration due its small particle size and lack of organic matter, reducing its overall water holding capacity. Water regularly, as sand dries out quickly, and incorporate as much organic matter as you can to help hold moisture.
- Use higher flow rate emitter 1.0 GPH (gallon per hour) or higher and space emitters every 6” to achieve equal distribution throughout root zone.
Clay soil has a tighter particle size, allowing it to hold more water for longer periods of time. As water enters this soil it spreads out laterally in a wide shallow fan before moving deeper. Due to this slow infiltration rate, it is important to supply small amounts of water with regular but less frequent irrigation cycles to avoid dry, cracking soil or saturated roots in a slow draining bathtub.
- Use low flow rate emitter .5 GPH or below spaced every 12” to accommodate fanning.
Loam soil is a combination of clay, silt and sand that is porous, retaining moisture while moving excess towards drier spots through capillary action (just like a sponge). Finger test your soil for moisture on the days following irrigation to determine how often to water.
- Use emitters with flow rates between 0.5- 2.0 GPH for even watering and distribution and 6” or 12” spacing depending on your plant type (veggies vs. perennials shrubs).
Using CIMIS for Water Budgeting
The California Irrigation Management Information System provides records from different regions throughout California to provide seasonal data to inform irrigation efficiency. One of the main factors affecting the amount of water needed from month to month is the the evapotranspiration rate (ETo) in a given area, which is the rate at which plants evaporate moisture off leaf surfaces and topsoil. ETo is a measurement created by relative temperature and humidity and can be influenced by the following:
- Weather parameters such as solar radiation, air temperature, relative humidity, and wind speed
- Soil factors such as soil texture, structure, density, and chemistry
- Plant factors such as plant type, root depth, foliar density, height, and stage of growth
How to use ETo or CIMIS data to inform watering needs
- To determine your CIMIS ETo Zone, check the regional map located here: http://wwwcimis.water.ca.gov/App_Themes/images/etozonemap.jpg
- Now that you know your zone, use the Monthly Average Evapotranspiration Rate Chart below to determine water needs for your zone by month – note this is water that needs to be resupplied to plants via irrigation in inches (think rainfall) due to water loss through evaporation, which occurs in larger amounts during the hotter months.
- To use the water budget feature on your controller, program the setting for July to read 100% as this is usually the hottest month, then calculate the percentage of water needed each month using July as the indicator.
For example: May in zone 4 requires 5.27 inches for optimal plant health, so divide 5.27/ 5.89 (July inches) gives you 89%. So set your controller to 89% watering during the month of May.

*Please note that the CIMIS monthly averages were determined using turf grass as the measureable species. Be sure to factor in WUCOLS plant factor and soil type to give you the full picture on how much water is needed.
Programming Water Run Time
Given all of the information above, how do you move from WUCOLS, CIMIS and Soil Type to actually programming water run times? Follow these steps to help you determine how long and how often to water each hydrozone in your landscape.
- Add up the flow rates of all of your emitters on one zone (or valve):
E.g 32 emitters x 1 gallon per hour = 32 total gallons per hour
- Add up the square feet of canopy area of your hydrozone:
Eg. 16 plants x 7 sq ft = 112 hydrozone square feet
- Now take the flow rate per hour (32) and multiply it by 1.605 (this converts your gallons per hour to inches); then divide that by the area of sq ft.
E.g (32 x 1.605)/112 =.46 Inches per hour of equivalent rainfall
- Then, find your zone on the CIMIS chart and the average amount of water lost during July = 5.89”
- Next, consult WUCOLS to find your plant factor multiplier. E.g. Medium water use plant = .6
- Now multiply 5.89” (inches lost in July) x .6 (plant factor)= 53” of water needed in July / 4 weeks = .88 inches per week needed
- Finally, use this equation to turn inches per hour into controller station run time.
Take what you can deliver in inches per hour x 60 (minutes per hr.) and divide it by what you need in inches per week x days you want to water. See equation below.
E.g (.46 x 60) / (.88 x 3days) = 10.45 minutes, round down to 10 minutes
- Last but not least, go to the irrigation timer and enter 10 minutes 3 days per week! E.g Zone 1 run time 10 minutes, days to water Monday, Wednesday and Friday
Always remember to consider the following when choosing plants and programing water times to ensure an efficiently saturated and happy garden!
- Install similarly rated plants on the same irrigation line e.g. all Low WUCOLS plants.
- Use emitters with flow rates ideal for your soil type, using at least two per plant at the drip line.
- Adjust the amount of water being supplied for seasonal fluctuations in temperature.
- Monitor irrigation while it is in operation to ensure there are no leaks and check on plants for optimal growth.

Thanks for joining Daily Acts! We hope you are inspired to use and add to this recipe book! Don’t forget that these homemade cleaning products you’ve made are improving our air and water quality. They are not only safer for your health, but are more cost effective too. Most importantly, we hope you have fun making your own products and share them with all your friends and family!
Table of ingredients:
- Castile soap: Made from 100% plant oils (typically olive oil or coconut oil), Castile soap includes no animal fat and no mysterious chemicals. It’s a true soap, not a chemical detergent, making castile soap completely biodegradable and very earth-friendly. This means it is also skin-friendly, unlike traditional soaps which can be extremely drying.
- Baking soda: A pure, natural product that is also a food, baking soda is non-toxic, unlike many other household cleaners. It is safe to use around children and pets and is ideal for cleaning food preparation surfaces. Baking Soda is a sodium bicarbonate: a naturally occurring substance that is present in all living things–it helps living things maintain the pH balance necessary for life.
- Vinegar: An acidic, clear liquid substance derived from fermenting alcohol, usually made from fruits or grains, that is used as a primary ingredient in many green cleaning products.
- Tea tree oil: Well-known for its powerful antiseptic properties and ability to treat wounds. Tea tree oil has powerful antimicrobial properties and can kill off harmful bacteria in your home.
- Borax: Sodium tetraborate or sodium borate — not boric acid (hydrogen borate), which is a common misconception. Borax is very effective, versatile, affordable, and eco-friendly compared to petroleum-based ingredients in conventional cleaning products.
- Lemon juice: Carries a powerful punch as a cleaner with natural disinfectant qualities. Straight lemon juice (fresh-squeezed or in concentrate form) is able to kill most of the bacteria in your home. The high level of acidity in lemons changes the pH level in bacterial cells, creating an acidic environment in which microbes can’t survive.
Bathroom: Soft Scrub
Here are two things you can do a couple times a week right after taking a shower to prevent extra cleaning and scrubbing:
- Spray the shower walls with vinegar to prevent mildew (keep a spray bottle filled with scented vinegar right in the shower stall to make this an easy job.)
- Use a squeegee to wipe down the walls.
Ingredients:
- 3/4 cup baking soda (slightly heaped)
- 1/4 cup castile soap (I use Dr. Bronners Peppermint, available in many grocery stores and health stores)
- 1 Tablespoon water
- 1 Tablespoon vinegar
- Make this in small batches because it can dry out and harden when stored. This recipe makes enough for 2-4 uses. Keep any remaining mixture in an airtight container.

Method:
In a bowl, combine the baking soda and castile soap. Add the water and stir with a fork to make a nice, soft, paste-like consistency. Scoop out the scrub with a sponge and start cleaning. This scrub can also be used to clean the toilet.
Bathroom: Homemade nontoxic disinfectant
Ingredients:
- 16 oz. water
- 3 tbsp. liquid castile soap
- 30 drops tea tree oil
- Mix together in a spray bottle

Bathroom: Disinfecting wipes
Recipe 1:
- 1/4 cup white vinegar
- 8-10 drops lemon essential oil
- 8-10 drops eucalyptus essential oil
- 5-7 drops tea tree essential oil
- 1 cup water
Recipe 2:
- 1 cup water
- 2 Tbsp Castile Soap
- 8-10 drops tea tree essential oil

Supplies:
- Squares of cloth – You can cut up an old t-shirt or receiving blanket, or any scrap cloth you have
- Container – You can reuse either an disinfecting wipes container or a baby wipes container
Method:
First, cut up squares of fabric for your wipes. Then, put the wipes into a container. You can either throw them into a reused baby wipes container or roll them up and put them in a reused disinfecting wipes container. (Roll them on a little bit of an angle so that the wipes in the middle stick up a little farther than the wipes on the outside and are easier to grab.
Laundry room: Homemade, non-toxic laundry detergent
Ingredients (makes about 48 loads):
- 1 Bar (14 oz) Fels-Naptha, Zote Soap or Ivory Soap
- 2 C Arm & Hammer Super Washing Soda (make sure it says “Super Washing Soda”)
- 2 C Borax
- Blender/Food Processor
Method:
- Cut the Soap into manageable pieces for the food processor/blender.
- Use the finest chopping blade available and grind the soap up, making the pieces as small as possible.
- Add the 2 Cups of Arm & Hammer Super Washing Soda to the grated soap.
- Next, dump in the 2 Cups of Borax.
- Mix everything as much as possible with a wooden spoon.
- Transfer the mixture into a cute jar or container.
- Use ⅛ Cup of the mixture for normal loads and ¼ Cup for heavily soiled clothes.

Laundry room: Liquid fabric softener
Method:
- Add 20-30 drops of your favorite essential oil to a one-gallon jug of white vinegar.
- Close the lid and give it a good shake.
- When it’s time to do your laundry, shake it once again, and use 1/3 cup per load.

Kitchen: Liquid dish soap
Ingredients:
- ½ cup liquid castile soap
- 1/8 cup water
- 4 drops essential oil scent of choice
1 tsp. homemade all-purpose citrus cleaner (or 1 tsp. of vinegar)

Living room: Furniture polish
Method:
Mix ¼ cup of vinegar with ¾ cup of olive oil or mix ¼ cup of lemon juice with ½ cup of olive oil. Wipe down furniture with a soft cloth and the solution.

Kitchen: Dishwater detergent
Ingredients:
- 1 8 oz. bottle of castile soap (almond or citrus are the best options for the kitchen)
- 1 C water
- 2 tsp. lemon juice
- 1 qt. size glass jar with lid
*If you have hard water, use about 1 ½ cup of white vinegar in the second detergent compartment

Method:
- Mix the ingredients in a jar, close the lid and shake gently. Do not mix vinegar and soap together.
- Fill open compartment with 1 Tbsp of the castile soap mixture made above.
- Fill closed compartment with about 1 to 1 ½ cup of white vinegar. You can use more vinegar if your water is hard. You can put vinegar in the “Rinse Aid” compartment as well.
Now that you are an expert at making homemade cleaning products, we challenge you to keep practicing sustainable actions. We hope that you will come join us for more exciting events. Thank you for making a difference. May your home always sparkle with the help of your very own recipes! Happy cleaning!
North Bay Fires and Environmental Health
How to Protect Your Family’s Health
The North Bay fires have released significant toxins into our environment that are affecting our health. Children are particularly vulnerable to toxic air pollution. The following are recommendations on how to reduce toxics exposure, provide extra nutritional and herbal support, and gently detoxify during this time.*
REDUCE EXPOSURE
- Monitor Air Quality Index at airnow.gov
- Keep children and pets indoors
- Protect your lungs with a mask – N95 or N100 are recommended. For more info: http://www.ncuaqmd.org/files/Wildfire/FaceMaskInfo.pdf
- Remove shoes when entering your home
- Change clothes when returning home
- Before going to bed, remove day clothes, bathe or shower and wash hair thoroughly
- Run a HEPA air purifier in your home
- Wet mop floors and wet dust surfaces to remove ash, then clean with all-natural cleaning solution
- Vacuum floors and fabric furniture well and often (HEPA vacuum recommended)
- Avoid toxic cleaners as they can further compromise your health
NUTRITIONAL SUPPORT
- Stay hydrated and take electrolytes
- Choose healthy, nutrient-dense foods like broths, soups and dark greens
- Avoid pro-inflammatory foods like sugar, friend foods, alcohol and factory-farmed meats/dairy
- Eat lots of fresh vegetables and fruits
- Encourage children to self-select their veggies and fruits to ensure they eat them
- Eat fermented foods for probiotic support
- Choose naturally detoxifying foods like broccoli, cauliflower, kale, brussels sprouts, cabbage, collard greens, spinach, beets, carrots, asparagus, apricots, plums, pumpkins, squash and sweet potatoes
HERBAL SUPPORT
These formulas are available at Farmacopia in Santa Rosa and Rosemary’s Garden in Sebastopol
- Soothe the throat with Throat Coat Tea, Throat Quencher spray, kids throat TLC, lozenges, honey
- Open up breathing passages with Cough Quiet, Kids Cough, Calm Breathing Tea, Healthy Lungs Tea, Old Indian Wild Cherry Syrup, Herbal Respiratory Relief, Mental Clarity Essential Oil
- Calm nerves with Kids Calm, Stress Recovery Essential Oil, Calm Tincture, Rescue Remedy Pastilles, Five Flower Essence
- Boost immunity with vitamin C, Zinc, activated B vitamins and mushrooms
Gentle Detoxification
- Pooping is good! Make sure your bowels are healthy. Magnesium will help
- Warm baths with epsom salts are great ways for kids to naturally detox
- Extra vitamin C
- Activated charcoal
- Chlorella
- Milk thistle/artichoke capsules
- Turmeric
- Eat lots of naturally detoxifying foods
SELF CARE
- Take time to rest and nurture your health
- Seek out support from family, friends, local organizations, mental health care
- Love yourself, you deserve it
*Recommendations are not intended to treat or cure any illness or disease. If you suspect that you have a medical problem, consult with your physician. Some herbs may cause an allergic reaction. Special thanks to Lily Mazzarella, MS, Herbal Medicine, Board Certified Nutrition Specialist, owner at Farmacopia in Santa Rosa, CA, for her wisdom and guidance.


What You Need
Ingredients – Makes 36 ounces
• Herbs, coarsely ground – 28 oz by volume (14oz/1.75 cups for each: tea & honey)
• Honey – 14 oz./1.75 cups
• Water – 24 oz./3 cups (for decoction and double boiler)
• Herbal tincture – 12 oz./1.75 cups (for syrup)
Equipment
• Measuring cup
• Clean mason jar(s) with lid(s)
• Thermometer for liquids (for honey)
• Double boiler (to heat honey)
• Label, permanent marker and clear packing tape
• Potato ricer or similar implement
• Cloth for straining: muslin, tighter weave cheesecloth, cotton gauze fabric or a clean t-shirt
• Glass bottle(s) to store finished product(s)
Note: You can prepare herbal honeys as stand-alone medicines and to sweeten teas and tinctures by following Step 3 below. Herbal infused honeys, made from dried herbs, have a very long shelf life.
This syrup contains equal parts (important to ensure proper preservation!), by volume, of:
• 1 part Herbal Honey Infusion (12 oz)
• 1 part concentrated Herbal Water Infusion or Decoction (12 oz)
• 1 part Herbal Tincture (12 oz)
Instructions
1. Gather & clean your supplies
2. Prepare the herbal tincture(s). To use homemade tincture(s) in your syrup, prepare it at least 4 weeks prior to making a syrup. You can also use store-bought tinctures or straight alcohol.
3. Prepare your herbal infused honey:
Coarsely grind dry herbs. Using a measuring cup, combine equal parts of herb(s) (14oz) and honey (14oz) in a double boiler and heat on low for 6 – 8 hours, stirring periodically. Honey temperature should not exceed 110-115 °F. If needed, add more honey to cover the herbs and replenish the water in the bottom pot of the double boiler.
While still warm, strain the honey through cloth. Press the honey from the herbal material by pressing with a potato ricer or similar kitchen tool or wringing out with your hands.
4. Make the concentrated herbal water infusion or decoction:
Measure dried herb in a measuring cup using 1 part herb(s) to 1 part water, by volume.
Example: 14 oz of herb(s) in 14 oz of water.
5. Combine honey infusion, water extract & herbal tincture:
Combine equal parts by volume. For example:
12 oz of honey + 12 oz of tincture + 12 oz of water extract (infusion or decoction)
6. Label syrup with: herb(s), date & alcohol percentage. Cover label with clear packing tape. Depending on the alcohol percentage of your tincture and whether you used fresh or dried herbs, the alcohol percentage in your finished syrup will be anywhere from 10-30%.
*Storage, Dosage & Safety tips:
If you used a tincture with less than 75% alcohol, keep your syrup refrigerated. The higher the alcohol content, the longer your syrup will keep. Look out for signs of spoilage such as bubbling, off smells or visible mold.
If you used a tincture with 75% or higher alcohol content, your syrup will have a final alcohol level of ~25% and should keep refrigerated for ~2 years.
Dosage will vary by herb. A general dose is ~1-2 teaspoons up to 3 x a day for a 150 pound adult.
Determining dosage in children by weight:
Assume adult dosage is for 150 lb adult. Divide child’s weight by 150. Take that number and multiply it by the recommended adult dosage. Example: for a 50 pound child, dose 1/3 the recommended dose for an adult. If adult dose is 2 teaspoons (10ml) of syrup, give 3.3 ml or ~3/4 teaspoon. Note that ½ of that dose is tincture so 1.1 ml in this example.
IMPORTANT SAFETY NOTE: Do not give honey to babies under 1 year of age.
Alcohol-Free Syrups: combine the tea and honey, in equal parts by volume and omit the alcohol for a slightly weaker, alcohol free syrup. This must be refrigerated and will last 1-2 weeks in the refrigerator.
What You Need
Ingredients
• Herb – washed if fresh or clean & dried
• Alcohol (menstruum/solvent) – amount will vary to cover total herb quantity
• Optional: for fresh roots – pruners to chop plant material and vegetable brush to clean roots.
Equipment
• Clean mason jar with new lid (no nicks!)
• Label, permanent marker and clear packing tape
• Amber glass dispensing bottle with polyseal cap
• Stainless steel funnel that fits into dispensing bottle
• Potato ricer or similar implements for pressing out the finished tincture
• Cloth for straining your herbal tincture: choose from muslin, tighter weave cheesecloth, cotton gauze fabric or a clean old t-shirt.
Instructions
1. Gather supplies & clean everything.
2. Chop plant material finely and place in an appropriate sized mason jar. Smaller pieces of plant material expose more surface area to your menstruum and extract more medicine.
FRESH flowers, seeds, leaves & bark: cover with menstruum leaving ~1 inch of liquid above the plant material.
FRESH roots: cover with menstruum leaving a ~2 inches of liquid above plant material.
DRIED flowers, seeds, leaves & bark: cover with menstruum, leaving ~3-4 inches of
liquid above the plant material.
DRIED roots: place in a mason jar large enough that the roots will fill half the jar and then fill jar almost to the top with menstruum.
The plant material may float, making it challenging to leave liquid on top. Sometimes you can press it down in a few days as the plant material absorbs the menstruum.
3. Place the lid on the jar and label with the following info using a permanent marker:
Common name, scientific name, date, menstruum & proportions
Optional but recommended: location herb was gathered or grown. Lot # (purchased herb).
Cover label with clear packing tape.
4. Keep tincture in a dark cabinet and shake daily for a minimum of 4 weeks. If you forget to shake it a day or two, do not worry. Frequent shaking = potent extracts.
Tips: The tincture can sit for months before straining so, no hurry. . .
After a few days your tincture will be quite strong! If you need medicine immediately, just pour what you need and leave the rest to finish extracting.
6. Strain tincture by placing straining cloth in a ceramic or stainless steel strainer over a glass
container. After most of the tincture has passed through the cloth, the remaining saturated herb needs to be pressed or wrung out. You can use your hands (consider wearing gloves to avoid skin irritation from the strong alcohol. Pour into a labeled bottle and voilà!
Optional: for large batches use an apple cider press, wine press or tincture press.
7. Compost the marc. . . after straining the tincture, the remaining ‘spent’ herb is called the marc. It may be composted with other vegetable compost.
8. Store tincture in an Amber (Boston Round) glass bottle with poly-seal cap to exclude light and make pouring easy. The poly-seal cap is resistant to solvents. Label as outlined above.
Optional: write down medicinal actions on the label as well to help your learning of herbs.
*Safety tips:
Your finished tincture should contain at least 40% alcohol to properly preserve it.
Alcohol tinctures are flammable so store away from fire or flames, such as near the kitchen stove.
Keep your tinctures out of the reach of small children and always label each bottle!
Store tincture bottles upright. Do not store tinctures in tincture bottles with droppers for more than 2 years as the alcohol will dissolve the rubber in the dropper, contaminating the tincture with plastic compounds. If the rubber dropper top has softened, and/or your tincture smells of rubber, discard
all of it.
What You Need
Ingredients & Equipment
• Herbs!
• Kitchen or garden scissors
• Rubber bands and/or drying screens
• Clean glass jars for storing herbs
• Labels, permanent marker and clear packing tape
• Optional: for fresh roots – pruners to chop plant material and vegetable brush to clean roots.
Instructions
1. Gather supplies & clean everything: Your herbal product is only as good as your raw
materials, including clean equipment! Wash and rinse all equipment in hot water. For extra
precautions wipe down with alcohol and allow to air dry.
2. Harvest your herbs! Harvest aboveground plants & flowers after morning moisture has
evaporated. Use kitchen or garden scissors for tender leaves or stems and pruners for woodier
stems. Take care not to bruise herbs or restrict airflow (i.e. don’t stuff into bags).
Harvest roots of perennial herbs in fall or early spring and biennials in autumn at end of 1st year or
spring of 2nd year. Use a sturdy digging fork and replant root crown at original soil depth, buds up.
Garble your herbs by inspecting for insects, disease, etc. and removing damaged parts. Wash off any
dirt as needed and process roots ASAP – scrub with a vegetable brush to remove soil & chop roots.
3. Dry herbs in a warm location with good airflow out of direct sunlight.
a) Bundle herbs with rubber band: easy method – hang herbs in bundles on an indoor line.
• Gather herbs in small bundles, < 10 stems per bundle.
• Split bundle into 2 and loop rubber band around the stems of one of the halves.
• Circle folded rubber band around entire bundle until it is taught.
• Loop rubber band over a few stems to hold band in place.
• Separate bundle into 2 halves and place on drying line.
b) Drying loose herbs in screens or baskets: for loose plant materials such as flowers, roots, bark or
free leaves, place material, one layer thick, screens or baskets that allow good air circulation.
Periodically gently shake herb material. Tip: lay cheesecloth or muslin between screen and plant
material to prevent harvest from falling through screen.
Thoroughly dried herbs should crunch when rubbed between fingers. Store herbs in labeled, airtight
glass jars out of direct sunlight.
4. Making teas…2 types of water extractions:
Infusions: herbs (lighter parts – flowers, leaves, fruits, those with high essential oil content) are prepared with a French press, stainless steel or glass pot, or infuser. Bring desired amount of water
to boil, pour over herb and let sit covered for ~20 minutes. Strain & drink.
Decoctions: tea that is simmered in water (tougher parts – roots, barks, hard non-aromatic seeds,
medicinal mushrooms). Prepare in stainless steel or glass pot. Place herb in water and bring to a boil,
simmer with lid on ~20-30 minutes. Remove from heat, strain & drink.
To combine – prepare decoction first, turn off heat, then add herbs to infuse for ~20 minutes.
Teas stay fresh for about 10 hours at room temp and 24-48 hours in the refrigerator.
General Proportions & Guidelines:
~1 tsp – 1 Tbsp of dried, coarsely chopped herb or 2 Tbsp of fresh herb per 1 cup of water. By
weight this is anywhere from 0.5 to 5 grams of dried herb for every cup of water.
A typical dose is approximately 3-4 cups of tea. This dosing method is not exact and is not
appropriate for herbs that have high potential side effects.
How to Make Lotion
Necessary Equipment
- Digital scale
- Blender
- Measuring cups
- Pouring pot
Ingredients
- Waters
- ⅔ cup rose water
- ⅓ cup aloe vera gel
- Essential oils of your choice *optional
- Oils
- ¾ cup herb infused olive oil
- ⅓ cup coconut oil
- 1 Tbsp lanolin
- 1 ounce beeswax
Instructions
- Combine waters in a glass measuring cup, add essential oils – set aside.
- In sauce pan combine the oils.
- Over low heat them just enough to melt.
- Pour oils into a blender and let them cool to room temperature. The mixture should become thick, creamy, semisolid and cream colored.
- When the mixture has cooled, turn on the blender at its highest speed. Put the lid on and remove the glass center piece. In a slow, thin drizzle, pour the water mixture into the center vortex of the whirling oil mixture.
- When most of the water mixture has been added to the oils, listen to the blender and watch the cream. When the blender coughs and chokes and the cream looks thick and white, like buttercream frosting, turn off the blender. You can slowly add more water, beating it in by hand with the spoon, but don’t overbeat! The cream will thicken as it sets.
- Pour the cream into jars. Store in a cool location.
Recommended websites
How to Make Lip Balm
Ingredients
- 2 Tbsp beeswax pastille
- 2 Tbsp shea butter
- 2 Tbsp coconut butter
- 30 drops peppermint essential oil
Instructions
- Melt oils in double boiler or saucepan.
- Add essential oils
- Pour into lip balm containers
*this recipe makes about 12-14 tubes
Soap Making
Necessary Equipment
- Several heat resistant bowls of varying sizes
- Digital scale
- Measuring cups
- Spatula
- Protective eye wear
- Rubber gloves
- Wisk
- Stick blender
Soap Recipes
100% Castile-Brine (Olive Oil Soap)
Ingredients
- Oils
- 33 ounces olive oil
- Water and Lye
- 10.9 ounces distilled water
- 1 Tbs Sea salt
- 4.2 ounces lye
Essential oils:
- 1 ounce orange essential oil
- .5 ounce black pepper essential oil
Goat Milk Soap
Ingredients
- Oils
- 22 ounces olive oil
- 8 ounces coconut oil
- 1 ounce castor oil
- Milk and Lye
- 10 ounces milk (frozen milk)
- 4.3 ounces lye
Essential oils:
- 1.5 ounces lavender
Instructions
*Precautions:
- Always use safety goggles that offer adequate protection!
- Wear chemical resistant gloves
- Pour lye into the water – NEVER the other way around!
- Mix the lye-water solution in a room with adequate ventilation. Pour carefully and stir gently.
- Have a vinegar/water solution ready to dip all bowls and utensils in after using
- Always mix lye solution in a heat safe container that is quite larger than the amount of liquid you are mixing.
- Add the lye to the water/milk and stir gently until all of the lye is dissolved
- In a bowl large enough to hold all of the oils and the lye/liquid solution, measure out the liquid oils by weight.
- In a separate pot on the stove top measure out the solid oils and warm until they are a liquid.
- Pour the melted oils into the container with the liquid oils.
- Slowly pour the lye/liquid into the oils stirring slowly with a heat resistant spatula
- Use the stick blender until trace is achieved.
- Add essential oils mix together with wisk or spatula
- Pour into molds.
- For goat milk soap place in the refrigerator for 2 days. Than let sit at room temperature for 3 days and then unmold.
- For all other soaps leave in the mold for 3 days and then unmold
- Allow the soaps to cure for another 4 to 6 weeks turning them every few days to ensure that they cure evenly.
Recommended Websites:
What You Need
Ingredients –
- Apple scraps from about 10 apples
- 3 teaspoons sugar
- Water
- Optional ¼ cup raw or unpasteurized Apple Cider Vinegar
Equipment
- Wide mouth glass or ceramic container
- Plastic or wooden stirring utensil
- Weight to keep apples under water surface (small bottle or jar full of water, rocks, marbles)
- Tight-weave cloth or paper coffee filter
- Rubber band
Instructions
- Gather supplies: Ensure you have all the equipment and ingredients necessary to make apple cider vinegar.
- Clean everything: When fermenting anything, it’s best to give the good beneficial bacteria every chance of succeeding by starting off with as clean an environment as possible. Make sure your jug and fermenting equipment are washed and rinsed of all soap residue.
- Put apple scraps and water into wide mouth container: Add your apple scraps to your jar and cover with water. Determine what weight you will use to keep the apples below the surface of the water (a bottle or jar filled with water does the trick, but you can also use a fermentation weight, rocks or marbles in a cheesecloth).
- Add sugar or raw apple cider vinegar starter: Add either sugar to start the fermentation process or raw, unpasteurized apple cider vinegar as a starter culture.
- Ferment and keep apple scraps under surface of water: This process will take at least two-three weeks before it starts to taste like vinegar. Tasting it is the best way to determine if it’s to your liking. Be sure to use a plastic or wooden spoon. Keep out of direct sunlight or heat. The warmer it is, the faster it will ferment.
- Strain apples from mix and stir: Strain the apples out of your liquid and discard. Return the liquid to the container and allow to ferment another 4-6 weeks until it reaches the acidity you prefer. Stir periodically.
- Bottle and refrigerate: Once its finished, pour your apple cider vinegar into a bottle with a lid. Don’t use metal. Refrigerate to cease the fermentation process and preserve flavor. Enjoy!
Source: http://talesofakitchen.com/raw/homemade-organic-raw-apple-cider-vinegar/
What You Need
Ingredients
- Red Wine to turn to vinegar
- Optional raw or unpasteurized Red Wine Vinegar
Equipment
- Wide mouth glass or ceramic container
- Plastic or wooden stirring utensil
- Tight-weave cloth or paper coffee filter
- Rubber band
Instructions
- Gather supplies: Ensure you have all the equipment and ingredients necessary to make red wine vinegar.
- Clean everything: When fermenting anything, it’s best to give the good beneficial bacteria every chance of succeeding by starting off with as clean an environment as possible. Make sure your jug and fermenting equipment are washed and rinsed of all soap residue.
- Pour red wine into wide mouth container: Red wine only needs access to air to turn to vinegar.
This process alone will take at least two-three weeks before it starts to taste like vinegar. Tasting it is the best way to determine if it’s to your liking. Be sure to use a plastic or wooden spoon. Keep out of direct sunlight or heat. The warmer it is, the faster it will ferment.
- Add raw red wine vinegar as a starter culture: Optionally, you can add a raw or unpasteurized red wine vinegar as a starter culture to your red wine to speed up the process. This ensures that you colonize the exact bacteria you want in your red wine vinegar much more quickly. You can start checking your mixture within one week to determine if it’s at your preferable acidity.
- Bottle and refrigerate: Once its finished, return your new red wine vinegar to its wine bottle or another bottle with a lid. Don’t use metal. Refrigerate to cease the fermentation process and preserve flavor. Enjoy!
What You Need
Ingredients – Makes 1 gallon
- black tea (8 tea bags or 2 T. loose tea)
- 1 c. white sugar
- 13-14 c. water
- 1-2 c. starter tea or distilled white vinegar
- Active kombucha SCOBY, or “mother”
Equipment
- 1-gallon glass jug
- Plastic or wooden stirring utensil
- Tight-weave cloth or paper coffee filter
- Rubberband
Instructions
- Gather supplies: Ensure you have all the equipment and ingredients necessary to make your kombucha.
- Clean everything: When fermenting anything, it’s best to give the good beneficial bacteria every chance of succeeding by starting off with as clean an environment as possible. Make sure your jug and fermenting equipment are washed and rinsed of all soap residue.
- Combine hot water and sugar: Heat the water until it is hot enough to steep tea, but not boiling. Add the white sugar to the heated water and stir to dissolve.
- Steep the tea: Add in teabags or loose leaf tea. If you are using loose leaf tea, a metal tea ball can be used but should be removed before adding the SCOBY. You do not want the tea ball to come into contact with the SCOBY.
- Cool the mixture: Cool the mixture to 68-85ºF. The tea may be left in the liquid as it cools or removed after the first 10-15 minutes. The longer the tea is left in the liquid, the stronger the tea will be.
- Remove the tea: Remove the tea bags or completely strain the loose tea leaves from the liquid.
- Add in the starter tea: Add starter tea from a previous batch to the liquid. If you do not have starter tea, distilled white vinegar may be substituted.
- Add your SCOBY: Add your active kombucha SCOBY to the mix.
- Cover: Cover the jar with a tight-weave towel or coffee filter and secure with a rubber band.
- Ferment: Allow the mixture to sit undisturbed at 68-85°F, out of direct sunlight, for 7-30 days, or to taste. The longer the kombucha ferments, the less sweet and more vinegary it will taste.
- Pour: Pour kombucha off the top of the jar for consuming. Retain the scoby and enough liquid from the bottom of the jar to use as starter tea for the next batch.
- Enjoy: Your finished kombucha can be flavored and bottled, if desired, or enjoyed plain.
2nd Ferment for Flavor
- Remove the SCOBY from the finished kombucha and set aside for a new brew.
- Add the desired flavoring and mix to combine. (try sweetened tea, juice, etc. – experiment)
- Bottle the flavored kombucha in airtight bottles leaving a few inches of head space.
- Leave the bottled kombucha to ferment for 2-4 days at room temperature. Taste to determine if ferment is ready. Should be bubbly and taste strongly of your added flavor. Do not leave too long on the counter or your bottle may explode.
Tips for a Toxic Free Home
You can effect immediate change at home by eliminating toxic chemicals and instilling new healthy traditions that your friends and family can model. From the outside landscape to inside your home, there are some really easy steps you can take to live toxic free.
Make your own Cleaning Products
- Use common household items like baking soda, vinegar and lemons to make cheap and effective cleaners.
- Find more easy DIY recipes in our “Green Your Spring Clean” resource or at www.wellnessmama.com

FACTS: Pesticides are toxic chemicals for killing insects, rodents, weeds, bacteria and mold. Many solvents and carrying agents in common pesticides cause side effects and can be hazards to health.
Seek Pesticide Free Solutions
- Prevent pests with good cultural practices – store food in tightly sealed containers, clean-up crumbs and spills, and seal cracks around doors, windowsills and baseboards. Repair drips and holes and get rid of standing water.
- Use baits and traps instead of sprays, dusts or bombs.
- Avoid chemical tick and flea collars, flea baths or dips.
- Consult Earth Easy for more ideas on non-toxic pest control at www.eartheasy.com

FACTS: Pesticides are toxic chemicals for killing insects, rodents, weeds, bacteria and mold. Many solvents and carrying agents in common pesticides cause side effects and can be hazards to health.
Ditch the Broom, Pick up the Mop
- Avoid moving harmful dust around with a broom and bust out the mop.
- Dust with a wet cloth and vacuum your house regularly (with a HEPA-filter vacuum if you can).
FACTS: Dust carries harmful chemicals that shed off of household furniture, electronics, and other household products like lead pesticides and flame retardants.
Pick your Plastics Carefully
- Use glass jars or ceramic bowls to store food.
- Never microwave plastic!
- Avoid plastics with recycle symbols #3 (PVC), #6 (polystyrene), and #7 (other) which have greater potential to leach toxics and are difficult to recycle.

FACTS: Plastic products can contain toxic additives such as phthalates, heavy metals and other compounds which leach out over time. Polyvinyl chloride (PVC), known as the poison plastic, is found in plastic products from toys and cookware to shower curtains.
- Leave your Shoes at the Door!
- Take off your shoes before entering your house to avoid tracking in oils and chemicals from the street outside.
- Use a door mat to catch dirt at the door.
FACTS: Shoes can track in toxic chemicals like lawn pesticides, coal tar from a driveway, not to mention anything else on the street…why bring that in your house?
Read your Make-up Ingredients

- Read the label to avoid chemicals like parabens, sodium laureth sulfate, and oxybenzone.
- Check the Skin Deep database at www.cosmeticsdatabase.com to find safer products.
- Use fewer products, and use them less frequently to reduce exposures.
FACTS: Personal care products contain a wide variety of chemicals, including some known to be of concern, and many that lack research to prove safety for women’s health. These products are applied directly to our skin where they are easily absorbed into our bodies.
Avoid Lead Exposure
- Keep children from playing around the edges of the home where old lead paint may be present in the soil.
- Test the soil for lead if there are plans to grow edible plants in your landscape. Plant kale, sunflowers or mustard plants around your home to suck up some of the lead particles.
- If you have lead in your house, put a fresh coat of paint over it, or hire a professional who is certified in lead abatement to sand and remove it for you.
FACTS: Lead can be found in house paint, dust and garden soil, especially in any home built before 1978 and is linked to poor brain developmental and other health issues.
Fragrance Free, the Way to Be!
- Eliminate odor – Identify the smell and eliminate or prevent it.
- Open a window – Ventilating your home with outdoor air has been shown to reduce symptoms associated with asthma, allergies and infections.
- Reduce odors naturally – avoid air fresheners and set out a bouquet of flowers or simmer herbs or spices on the stove instead. Make your own air spray with water and essential oil.
- Shop for cleaners, laundry detergents, and personal care products labeled “fragrance-free” Warning: “Unscented” does not always mean fragrance-free!
THE FACTS: Synthetic fragrance can be made up hundreds of chemicals, which companies are legally allowed to keep secret from consumers. Common fragrance chemicals include phthalates (linked to reproductive and developmental harm) and synthetic musks (linked to increased risk of breast cancer).
What Is A Food Forest?
A food forest is an edible landscape that mimics a natural forest in form and function. Natural systems don’t require human inputs to flourish. Instead, the various species form a web of interconnection where they feed off and support each other in a closed, sustainable system. In these systems each plant serves more than one function (i.e. accumulating nutrients, producing mulch, attracting beneficial insects etc.).
When we design and plant a food forest our goal is to create a system that produces food, habitat and medicine while requiring very little human input.
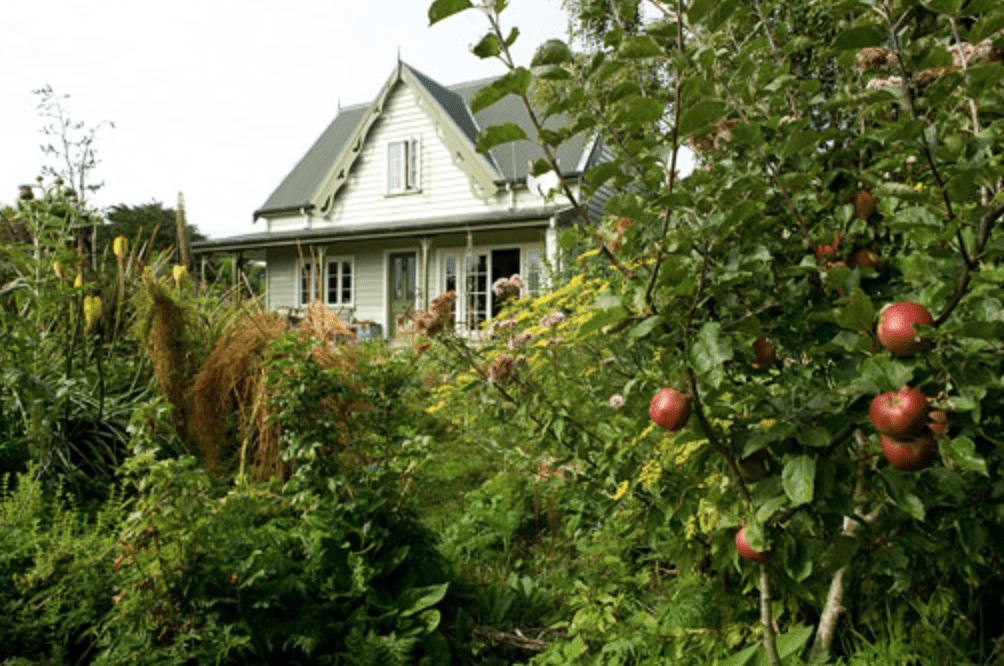
Layers Of A Food Forest
Just like in an actual forest, a food forest has many layers with different species of plants inhabiting each layer. For example, tall trees create a canopy layer, providing shade, harvesting water (from fog), producing mulch and creating a sheltered area in which other plants can grow.
Below the canopy is an understory layer of smaller trees and shrubs, which provide structure for climbing plants and vines. The food forest floor is home to groundcovers, herbs and root crops.
Each species within this system inhabits a specific niche but serves more than one function. Some plants produce a food crop while also fixing nitrogen in the soil. Other plants produce edible or medicinal leaves while also sending down a deep taproot that breaks up the soil and draws up nutrients to the surface.
- The Canopy Layer of the food forest usually consists of large fruit trees and nut trees.
- The Understory Layer consists of dwarf fruit and nut trees.
- The Shrub Layer often has berries and currants.
- Vines such as grapes create a vertical layer as they climb the shrubs and trees.
- Perennial Herbs and Groundcovers fill in the forest floor, shading out weeds and providing culinary and medicinal benefits. These herbaceous plants also attract beneficial insects. Even annual vegetables can fit in here.
- Root Crops such as Daikon radish break up the soil allowing water to infiltrate.
Plant Guilds
A guild is a grouping of 3 or more plants that have a beneficial relationship. The classic example is the “Three Sisters:” corn, beans and squash. In this guild the corn provides structure for the beans to climb; the beans fix nitrogen in the soil, which feeds the corn and squash; and the squash shades the ground, helping to keep the soil cool, moist and free of weeds, while also producing mulch.
A food forest can be made up of many different plant guilds which come together to form a productive, resilient and (mostly) self-sustaining system.
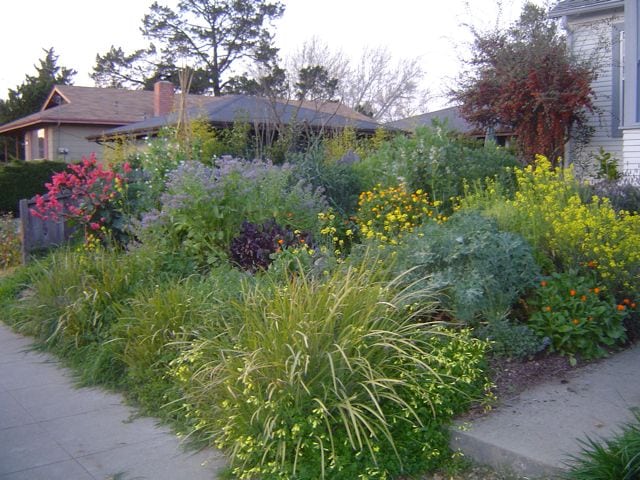
Inputs
Although the goal is to create a self-sustaining landscape, certain inputs are needed. The initial purchase of fruit trees, shrubs and perennial plants is the major input. Ongoing watering via drip irrigation will be needed to sustain the plants, especially in the early years as they get established. All gardens require some maintenance, depending on the level of which is influenced by the desired aesthetic. One way to keep ongoing maintenance to a minimal is using the “chop and drop” method: laying cuttings down in place, which produces mulch and returns nutrients into the system.
With situationally appropriate design, the end result is a low-water-use landscape that produces food, fiber, medicine and habitat while building topsoil and increasing biodiversity. Compared to a grass lawn — which is essentially a monoculture and requires a lot of water, synthetic fertilizers, herbicides, and oil — a food forest is an earth-friendly, eco-groovy amalgamation of multi-functional fecundity and delight.
More Than Just Food
Beyond just producing food, a food forest can also provide habitat for wildlife as well as fuel, fiber and medicine for humans.
The structure of a forest landscape can create an enchanting, natural-feeling space, which can be a welcomed contrast to the one-dimensional landscapes that often fill our neighborhoods.
Additional Resources
Edible Forest Gardens by Dave Jacke
Gaia’s Garden by Toby Hemenway
Permaculture: A Designer’s Manual by Bill Mollison
Learn from others: Local Sonoma County chef, Steve Rose, has owned and operated Sonoma County-based Vineyards Inn for 35 years and the restaurant composts 100% of its food waste through an on-site in-vessel Earth Tub composting system. Another model for commercial-scale composting is the vermicomposting system at Sonoma Valley Worm farm, which Steve explores on his program, The Organic Rose.
We’d love to learn how other great local businesses are composting their organics. Please share your stories with us at [email protected].
Install a compost system: Alamada County-based public agency Stop Waste has developed a great resource guide, How to Compost at Work, which takes businesses through a step-by-step process of auditing their waste, choosing a system, identifying a coordinator, creating a maintenance plan, and troubleshooting.
Inspire composting actions & engagement: The Community Resilience Challenge team would love to work with businesses to help customize your Challenge actions around composting! Contact us at [email protected]
Water-wise isn’t just about using less water, it’s also about being creative with the water we do have — especially the free kind that comes right from the sky. As evidenced by the memorable storms of recent winters, rain events are predicted to become more severe and less frequent in our area, meaning that we’ll receive occasional surges of valuable but potentially destructive water. How can we re-envision our developed landscapes to more effectively utilize the gift of rain?

Here are three methods for DIY rainwater catchment that can help you become a water-wise wizard and a model to your friends and neighbors.
1) ‘Slow it’ with rain catchment systems
The simple installation of rain barrels, tanks or cisterns off of your home’s rain gutters is becoming a relatively mainstream concept, with information and materials readily available in your local hardware store. There are many ways to go about designing your system so that it can effectively store a whole season’s worth of rain, or just individual rain events. Depending on your storage capacity this free water source can be used for irrigating your landscape during dry months, reducing both your water bill easing your conscience at the same time. To give you a sense of how much rain you can collect: a 1000 square foot roof will shed 600 gallons for every inch of rain that falls!
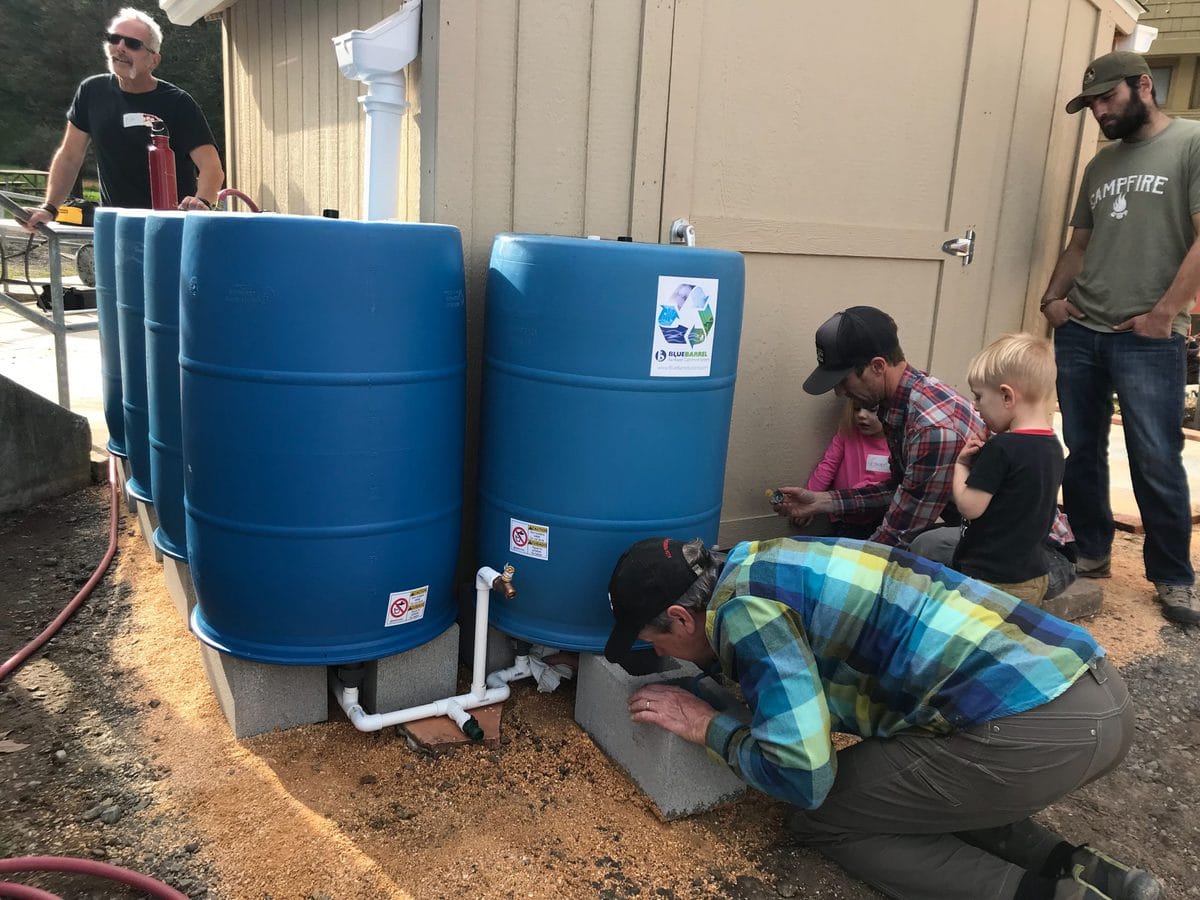
2) ‘Spread it’ with mulch applications
The unsung hero in the garden landscape: mulch provides numerous benefits besides the aesthetically pleasing ‘finished look’. Adding a layer of mulch to your garden can help cut down on erosion, minimize compaction of soil during heavy rain events, maintain soil temperature, replenish organic content of soil as it breaks down and prevent weed growth. Organic mulches like woodchips have a high water-holding capacity, which creates additional storage space for excess water until it can be taken up by soil and plants. Generally applied to lawns, sheet mulching is a process in which compost, cardboard and woodchips are added to the landscape in thin layers, creating more surface area to spread and capture rainwater on-site, while reducing weeds and increasing soil fertility as it decomposes.
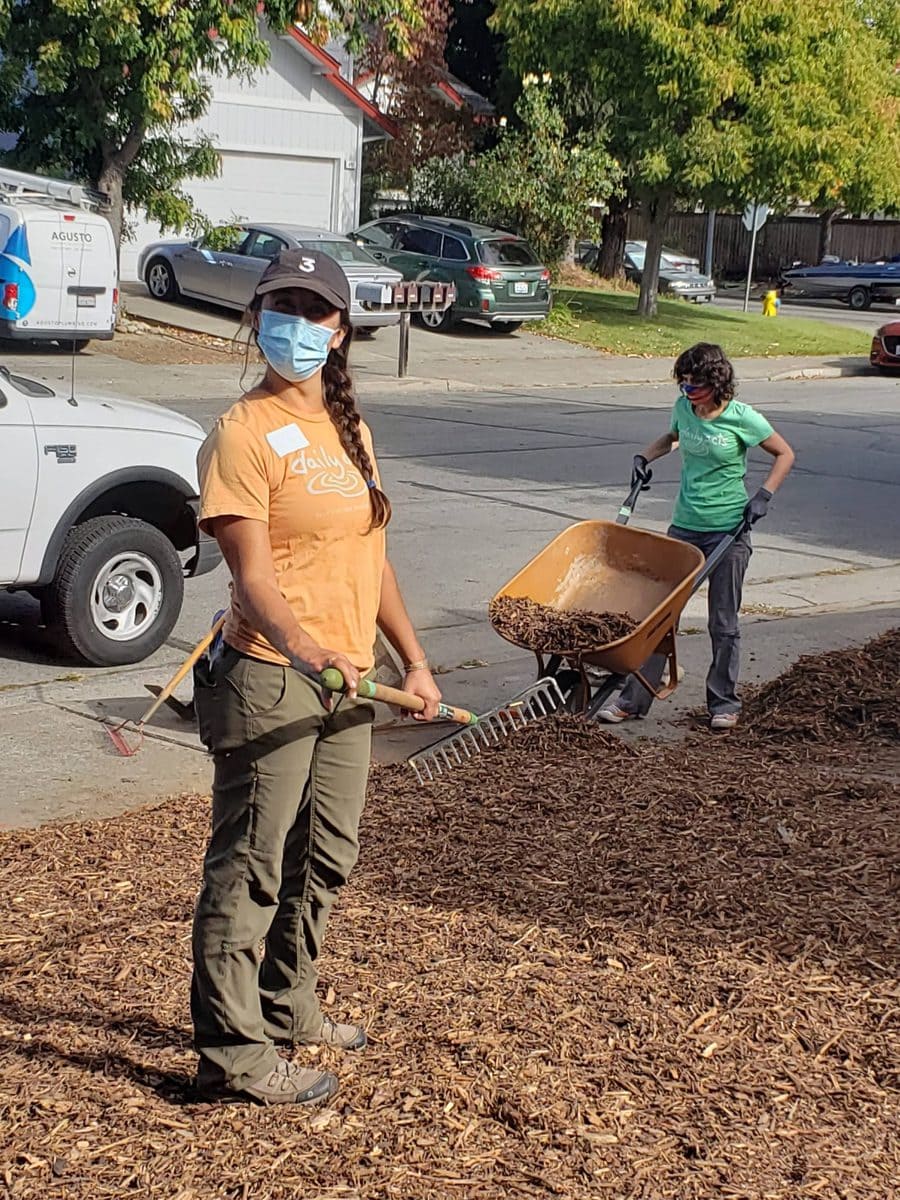
3) ‘Sink it’ through rain gardens and bio-swales
The addition of rain gardens and swales in your landscape offers two simple ways to increase stormwater capture and recharge our aquifers. These strategically designed low depressions and channels create holding places for water to collect and sink rather than run off over heavily saturated soils or impermeable surfaces. While both of these features can function well with a dry riverbed look, incorporating water-wise plantings will increase both the aesthetics and the benefits. The use of native plants in particular can provide much needed habitat, slowing the water and acting as bio-filters for harmful pollutants all at the same time. Be sure to place plants best suited to wet conditions in the center, moving from seasonally wet preferences into dry conditions towards the edges for best results. Check out this video tour of our rain garden at the Petaluma Library!
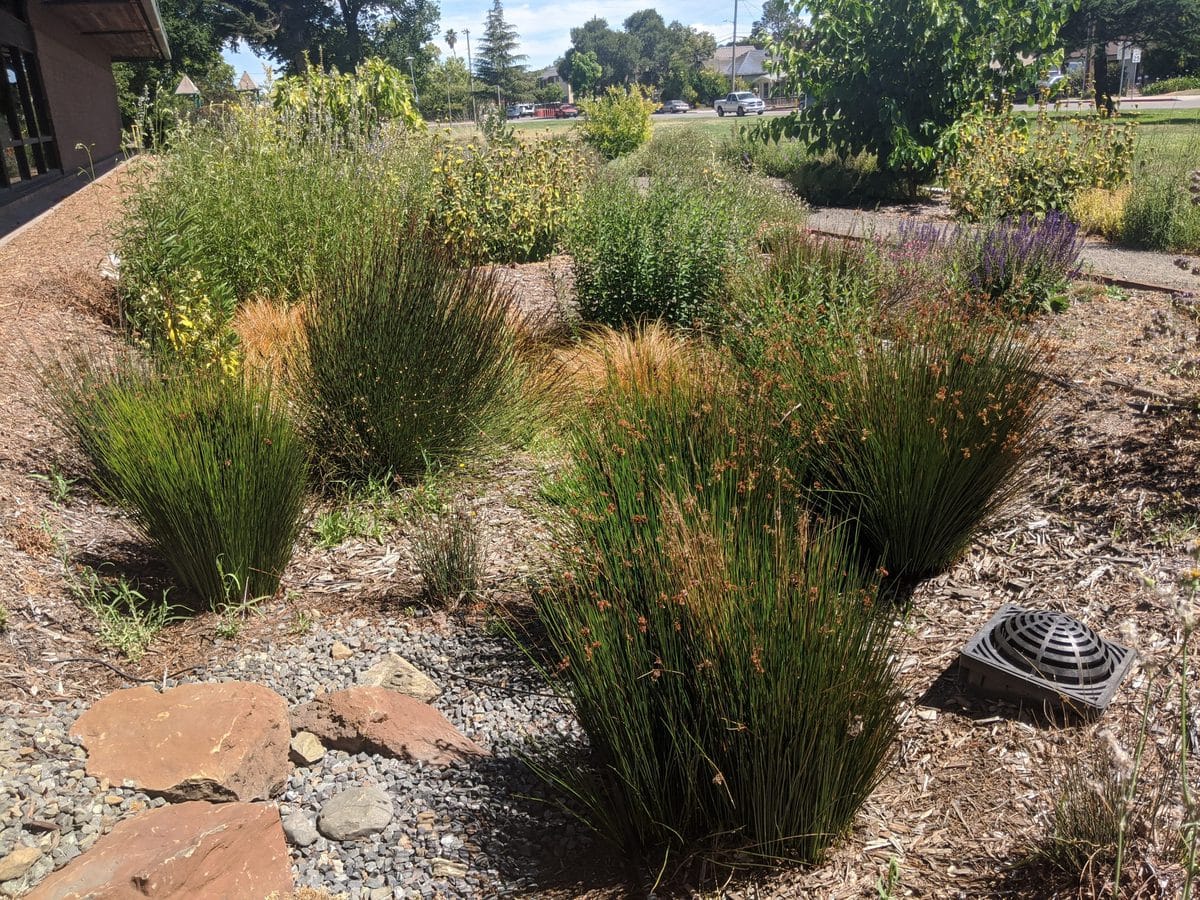
Where do you find the resources to make all your conservation dreams come true?
Many of our local municipalities in Sonoma County have incentive programs to help residents reduce water use both inside and outside the home. Programs like Petaluma’s ‘Mulch Madness’ (which delivers cardboard, mulch and compost to your door for free!), Cotati’s ‘Cash for Grass’ and Windsor’s ‘Efficiency PAYS’ program all provide incentives to reduce outdoor water use. The City of Santa Rosa’s ‘Green Exchange’ program also offers similar programs along with a rebate for installing a residential rain catchment system.
If you’re looking to grow your skills and gain some hands-on experience or guidance before taking the plunge, Daily Acts offers workshops throughout the year on rain catchment system design and installation, rain gardens, bio-swales and sheet mulching.
Watch this webinar recording on rainwater catchment with Jesse Savou of Blue Barrel Systems
Watch this recording of a conversation about sheet mulching and Petaluma’s Mulch Madness program
Download the official ‘Slow It. Spread It. Sink It. Store It!’ booklet (PDF)
 Did you know the average family of four uses 5,000-8,000 gallons of water annually in their washing machine alone? If 100 families installed a simple Laundry-to-Landscape greywater system, we could save 500,000-800,000 thousand gallons of water a year and put that precious water into our gardens instead of sending it the waste water treatment plant.
Daily Acts’ aim is to mobilize and support the installation of hundreds of greywater systems in Sonoma County. Are you in???
- Save water–depending on your water usage, your family will save thousands of gallons of water each year
- Save money – we will teach you to use the water that you’ve already paid for, again!
- Enhance Safety – your laundry will be safer for your family and the environment by using plant-friendly detergents and cleaners
- Create Beauty – you will increase the beauty and bounty of your home gardens by irrigating with greywater
- Build Community – build community by working together with neighbors and friends on your greywater installation!
- Build a Movement – get educated, engaged, and trained to share the goodness with others.
Laundry-To-Landscape (L2L) System Overview
California plumbing code defines greywater as wastewater generated from bathroom sinks, showers, tubs and washing machines. Though all of these sources represent great opportunities to transform waste to resource, the Laundry-to-Landscape system is the simplest, most cost-effective, and does not require a building permit, making it an excellent place to start!


Frequently Asked Questions (about greywater)
Other Great Sources of Info
- Water Savers — Parts and plumbing support
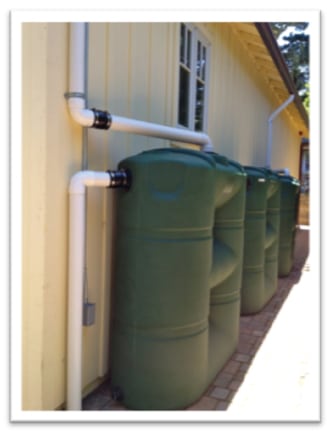 Collecting rain from the roof of your house is easy, practical and can provide long-term savings on your water bill. Rain catchment also reduces the amount of runoff that flows into creeks and storm drains, easing the burden on wastewater treatment plants and reducing the amount of pollutants washed into local streams and rivers.
With California’s seasonally wet climate, rainwater catchment can help stretch the wet season well into the summer months.
Types of Tanks and Barrels
Rain tanks and barrels are available in a wide range of sizes and shapes. Some are designed to stand flat against the house, some are round and some are like giant bladders that can rest underneath a porch or in an old swimming pool. Rain can also be stored in tanks underground.Keep in mind that for tanks over 5,000 gallons you’ll need to get a permit before installing.
Although the prices are coming down, rain collection systems are still relatively expensive. For most systems, you can expect to pay about $1 per gallon of storage. Some systems are more expensive than this, but it is also possible to set up low cost systems using recycled food storage barrels.
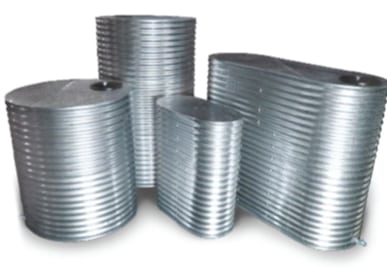
How Many Gallons Should You Collect
The size of your collection system will depend on how much space you have for tanks, what your budget is, how big your roof is and what your water needs are. Each situation will be different so it is up to you to decide how big you want to go. If you have the space, the money and the need for a lot of irrigation water, than a big collection system would be right for you. That said, starting small is a great way to go, especially with modular systems, which can be expanded over time.
Roof Materials and Health Concerns
Most roofs are safe for collecting rainwater, but there is potential for leaching from some roof materials. This is mainly important for collecting drinking water (which is not legal in California) but might be a consideration if you are using the rainwater to irrigate vegetables. There is no consensus about which roof materials are best (or worst) but brand new roofs can leach more pollutants than older, weathered roofs.
Roofs that are close to busy streets or large vineyards can collect car exhaust or pesticides from spraying, but a first flush system (see below) can be easily installed to shed any polluted water.
First Flush System
If your roof tends to accumulate leaf litter and other debris, then a first flush system can be installed to divert the initial flush of water that comes off the roof in a storm, keeping the rain tank free of debris, pollutants and harmful bacteria.
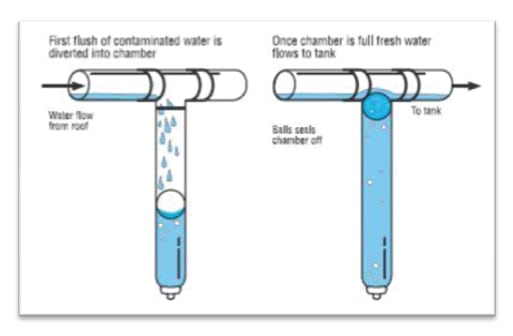 The first flush system is essentially a mini collection system, which fills up first before allowing the rainwater to flow into the rain tank. Once the first flush system is filled, a floating ball plugs the inlet, allowing the rest of the rainwater to go straight to the rain tank. The first flush system should be drained between major storms or if a lot of new leaf litter or pollutants have collected on the roof.
Calculating Catchment Potential
Total Catchment Potential (gal)= A x R x 0.6
The amount of water you can collect is determined by the catchment area and the amount of rainfall. The calculation that is most often noted is that you can collect about 600 gallons of water from one inch of rain falling on a 1,000 square foot roof. To determine your collection potential, first estimate the square footage of the roof you’ll be collecting from, then plug that into the following equation.
- A = catchment Area in square feet (see formulas for different shapes)
- R = annual Rainfall in feet = annual Rainfall in inches / 12
- 0.6 is a run-off coefficient. In rain events, some water is lost to evaporation and minor infiltration to the catchment surface. The coefficient represents the amount of water that runs off your roof into your system. While runoff efficiency differs depending on the material of the catchment surface, 0.6 is a commonly used coefficient.
Irrigating with Rainwater
The easiest way to irrigate with rainwater is to hand water by filling up a watering can from the spigot on the rain tank or attaching a hose to the rain tank. You can also attach a soaker hose if you have enough pressure (hint: drill larger holes in the soaker hose to reduce the need for a high pressure system). The higher uphill your tanks are from the area you want to water, the more pressure you’ll have.
Rainwater can be run through drip irrigation but you’ll need to install a pump to get the appropriate pressure. This set-up works better with a larger rain tank, rather than smaller barrels.
Overflow and Safety
An overflow pipe should be installed to direct excess water to a rain garden, a swale or to a storm drain if necessary. Rain tanks and barrels should be strapped to the house to keep them from falling over in the event of an earthquake.
Additional Resources and Readings
Rainwater Harvesting for Drylands and Beyond – Brad Lancaster
Imagine a garden that thrives during droughts: bursting with colorful blooms, delicious fruit, the melodies of song birds, and healthy bees. The following landscape elements will help ensure that your garden is slowing, spreading, and sinking as much water as possible rather than wasting it and causing runoff. The result? Lush gardens that use less to do more.
THE RIGHT PLANTS
Every water-wise garden needs the right plants grown in the right places. Native plants are always a good choice, as they are adapted to California’s seasonally dry climate. Many non-native plants from locations with similar Mediterranean climates will also do well. Arranging plants so they have appropriate shelter from drying winds and hot afternoon sun can also help reduce water requirements. Hardy perennial food plants provide multiple benefits, and even annual fruit and vegetable plants can be grown with water efficiency in mind. See our ‘Water-wise Plants we Love’ resource for more details on good selections for your water-wise garden.
MULCH
Increase the living sponge of your site with a thick layer of mulch. Mulch reduces erosion, slows evaporation and builds better soil over time. Better soil (ie. soil with more organic matter) in turn absorbs and holds more water. A nice layer of mulch also creates a prime canvas to display your gorgeous plants. Cover any bare soil with fallen leaves, wood chips made from tree trimmings, or rice straw. Just be sure that mulch isn’t piled up around the stems or trunks of plants.
SWALES
Swales are thoughtfully designed ditches that enable rainwater to slow, spread and sink into the soil. Capturing water in the soil is the cheapest and easiest way to harvest large amounts of rain – doing so hydrates your landscape and recharges groundwater. Berm and basin swales, built along the contour of a hill, help infiltrate water flowing down a slope and create a lens of water underground available to plants downhill. Infiltration basins can be either deep narrow ditches or simply holes, which are then filled with mulch to help hold water on flatter surfaces. Rain gardens are another form of swale that incorporate plants. Much more detail about swales can be found in our rainwater harvesting resources.
PERMEABLE SURFACES
Remove hardscape to maximize rain-absorbing garden space. Permeable pathways of gravel, mulch, and even brick allow more water to soak into the ground. Consider installing permeable pavers or vegetative planting strips in place of concrete in driveways or plant rain gardens in parkway strips along sidewalks to increase permeability and reduce runoff at your site.
DRIP IRRIGATION
Forget sprinklers. A simple system of tubing and emitters delivers the right amount of water right where it’s needed. You can also easily convert a sprinkler head to feed your drip system, which makes setting up irrigation for your lawn-to-garden transformations very simple. An automatic timer can be added to ensure consistent watering. If you don’t have an irrigation system, get in the habit of hand watering. Either way, you’ll use less water and get better results because you’ll be giving each plant just what it needs.
RAIN TANKS AND BARRELS
Did you know that over 600 gallons of water can be captured for every 1” of rain falling on a 1000 ft2 roof? That’s a lot of water, even in a dry year! Rain tanks and barrels use your gutter system to harvest the precious gift of rain, preventing waste, erosion,and flooding. With tanks and/or barrels, you can hold on to the ample water that lands on your roof and then release it slowly into your landscape through irrigation, keeping your landscape looking lush well into the dry season
GREYWATER
A great way to supplement landscape irrigation is by reusing the gently used water from your laundry machine, shower, and/or bathroom sink. Greywater is perfect for watering trees, shrubs, and even smaller annuals and perennials, and is easy to set up. Laundry-to-landscape systems do not even require a permit in most CA cities. Appropriate soaps are easy to come by, and the system is very easy to turn off if you ever wanted to. Greywater helps you get double duty out of the water you’ve already paid for, and reduces the use for fresh drinking water for irrigation. Further info is available in our greywater resources.
Harvest More Rain in the Landscape with Rain Gardens
A rain garden is a planted depression in the soil which slows and infiltrates rainwater before it becomes polluted and erosive stormwater runoff. Usually, it is a small garden shaped like a shallow pool or ditch, which collects rainwater from a roof, roadway, or nearby hard surface. The plants are chosen to withstand extremes of moisture, as they may be in standing water for parts of winter and then must survive summers with very little moisture. The plants help absorb and infiltrate the water, so are critical component of a functional rain garden. Ideally, your rain gardens will be sited close to the source of the runoff and serve to slow the stormwater as it travels downhill, giving the stormwater more time to infiltrate and less opportunity to gain momentum and erosive power. It encourages water to walk across the landscape rather than run off. Rain gardens not only keep our waterways healthier, but they also recharge your soil with high quality water that your plants will love!
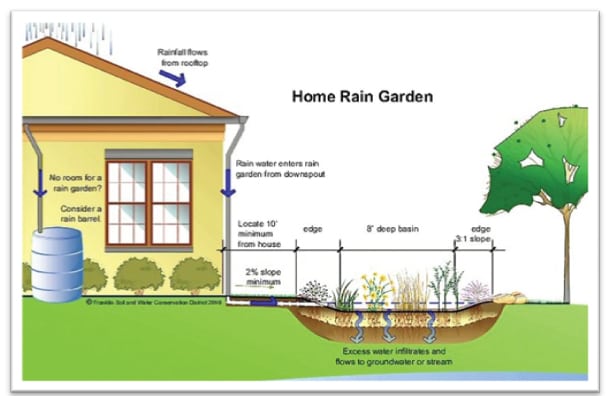
With a planted depression or a hole, a rain garden takes full advantage of scarce resources with the opportunity to be absorbed, integrated, and saved.
Design Considerations for Rain Gardens
Rain Gardens are best placed near the source of runoff although with enough margin so as to not cause damage to the foundation of the structure. Here are some other tips to consider when designing your rain garden:
- Avoid damage to roots and foundations; place gardens a minimum of 10’ away from any structure or shallow-rooted trees.
- Maintain a 3:1 or 2% slope until you reach the “edge” of the 8-12” basin to allow water to pool and percolate, preventing erosion.
- Keep it away from your septic system and drain field, rights of way, and underground utilities or service lines to avoid damage and contamination.
- Place in in full or partial sun, so as to ensure evaporation in the event of excess water pooling.
Benefits of Rain Gardens
There are many benefits to the installation of a rain garden on your property, including increasing your property value. Here are a few more to consider:
- Reduce the amount of polluted stormwater reaching our rivers
- Filter pollutants such as oil, fertilizers, salt, pesticides, metals and bacteria out of runoff
- Promote infiltration and recharge of the groundwater table
- Reduce local flooding potential
- Conserve water
- Create diverse habitat for birds and butterflies
- Reduce landscape maintenance in terms of time and money
Ideal Plants for Home Rain Gardens
Plants with deep fibrous roots tend to have a competitive advantage in a rain garden and provide the most cleaning and filtration benefits to the environment. Rain gardens are typically populated with natives or native cultivars as these are most well adapted to a locality. Listed below are a few great examples for our region to help you get started:
Grasses
Carex tumulicola- Berkeley Sedge
Juncus patens –Common Rush
Muhlenbergia – Deer Grass
Stipapulchra – Purple Needle Grass (California State Grass)
Shrubs
Solidagospathulata- California Goldenrod
Eriogonumsp.–CA. Buckwheat
Mimulusaurantiacus – Sticky Monkeyflower
Epilobiumcanum – California Fuchsia
Lupinusalbifrons – Silver Bush Lupine
Sambucusnigra– Blue Elderberry
Here’s another great article that sums up just what a rain garden is and how to properly tend to one:
A Guide to Building and Maintaining a Self-Sufficient Rain Garden
How to Create a Water-wise Habitat Garden (pdf)
While many gardens can be designed around attracting particular kinds of insects or birds, it is also easy to plan and maintain your garden in a way that provides habitat and food year round for many and diverse migrating and stationary fauna. Be sure to consider the following when choosing plants and adapting practices to create a wildlife friendly garden.
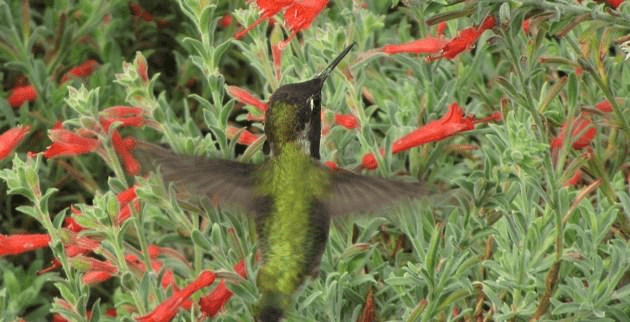
What makes a flower attractive?
Pollen and nectar bring bees, butterflies and hummingbirds to the garden, because they are attracted to flowers that provide them with a food source. To provide a bountiful buffet that brings in the pollinators, plant selection for your garden should be based on the preferences of the bees and butterflies and take into consideration the time and duration that the flowers bloom.
Plant Native Species
While gardens can be a mix of native and non-native species, planting native species does have several advantages. Native species are adapted to the local climate and soil conditions, making them easier to care for in a landscaped setting. Having evolved with native fauna over the years, native plants typically have symbiotic relationships with them. Putting native plants in your garden will provide food and shelter for native animal species, promoting biodiversity. In other words, if you want to attract native species of butterflies, bees and birds the best way to do it is by planting native plants.
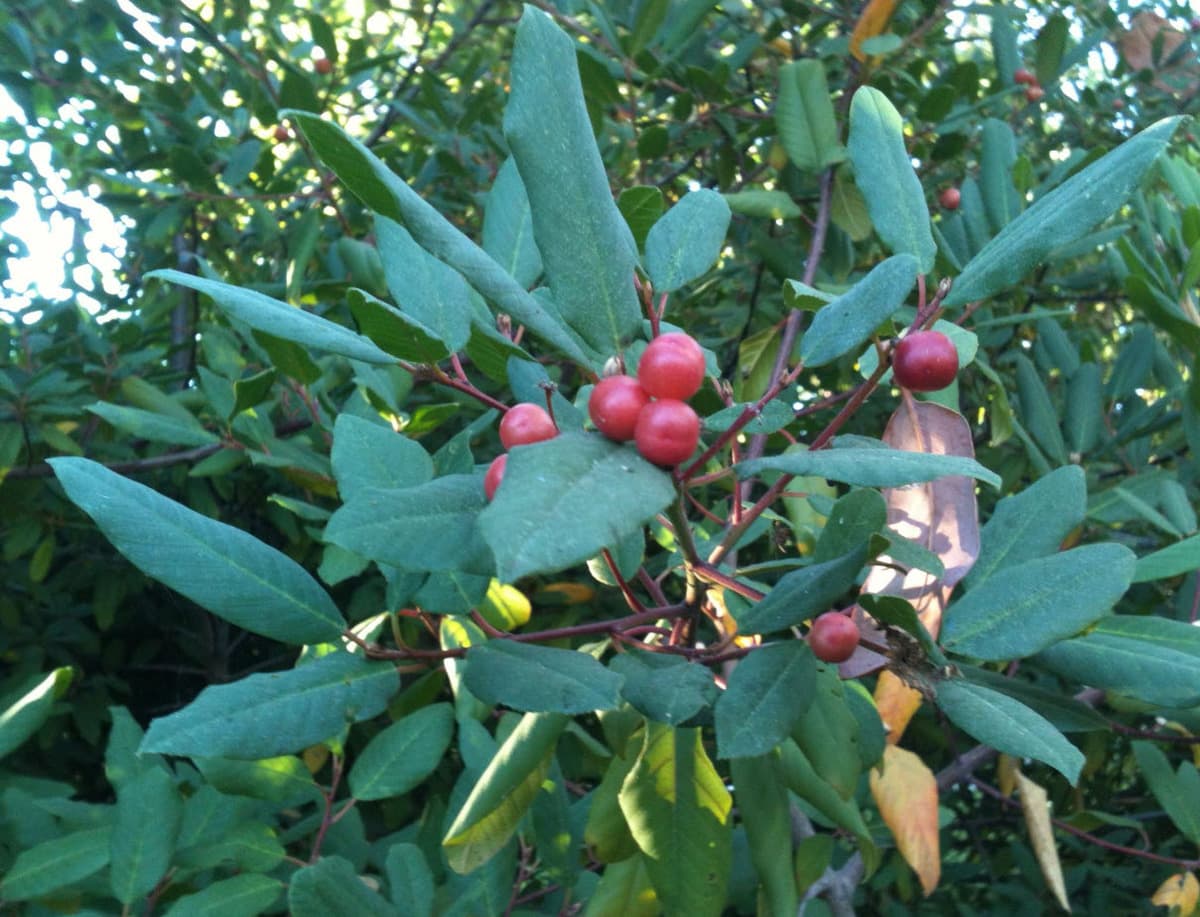
Create Groups of Color
Butterflies, bees and hummingbirds will be attracted to a garden by a large patch of bright flowers; patches should be planted closely together- this cuts down the distance the pollinators have to travel as they fly between flowers and makes the pollination process more efficient.
Use a variety of plant forms
Plant a garden with all types of plants: annuals, perennials, bushes, trees, herbs, vines and grasses. Choose plants that grow to different heights and forms, providing structure for habitat, those that form seeds and berries, are a variety of colors, shapes, sizes and blooming times. Different species have different preferences!
- Gardens with 10 or more species of nectar and host plants attract the largest number of bees and butterflies
- If you are looking for a particular butterfly, choose plants that provide food and shelter for larval development to encourage butterflies to stick around and lay their eggs in your garden
- By having plants blooming throughout the spring, fall and summer seasons you will provide a continual source of pollen and nectar to native species of butterflies, bees and other insects which will in turn provide food for birds.
- Shrubs and trees are important to have in a garden because they provide night roosting spots and habitat for perching, eating, nesting and breeding for birds.

Take advantage of the sunshine: Sun is essential for butterflies as they are cold blooded insects and need to start the day off by warming in the sun. Planting nectar plants, placing large rocks and exposing areas of soil in sunny spots throughout your yard will provide inviting habitat for butterflies. Planting trees and shrubs can also help by providing wind protection as long as they do not shade out the flowering plants.
Low maintenance is a good thing: fallen leaves can provide both natural mulch for your garden and hiding places for insects a well as egg laying surfaces for butterflies. Avoid removing old branches or logs from the garden as these can also provide important habitat for beneficial insects and decomposers.
Leave areas of uncovered soil: Native bees tend to be attracted to less manicured gardens. Most solitary native bees are ground dwellers and will use these open spaces to make nests. Open areas in a garden can also provide warming areas for the butterflies.
Avoid pesticides: A healthy garden needs bugs. Many pesticides are toxic to bees, butterflies and other pollinators. By planting native plants in your garden you are providing additional habitat for beneficial insects that can help control pest populations in your garden.
- Planting hedgerows of certain species that are know to attract beneficials such as Baccharispilularis or coyote bush- over 250 species of insects use this plant – and Ceanothus ssp. will provide you with a thriving community of insects as your garden’s first line of defense against species like aphids. For example, native ground beetles make their homes in native bunch grasses by day and hunt for slugs at night.
Avoid pruning during nesting season: many birds will not revisit their nests after human contact, leaving their newly laid eggs behind. Keep our bird populations healthy by avoiding any large removal of branches on shrubs and trees from March- August each year.
Buckeye Nursery
2425 Old Adobe Rd, Petaluma
707-559-7081
www.buckeye-nursery.com
Mon-Fri 8-5
Broad selection of California native plants, meadow grasses and habitat friendly choices for sustainable garden environments, which use less water and require less maintenance.
California Flora Nursery
2990 Somers St, Fulton
707-528-8813
Hours vary by season.
www.calfloranursery.com
An unconventional nursery devoted to natives and habitat gardening that has an exceptional diversity of offerings with attention to local needs, conditions, and sustainability. Most plants are propagated and grown on site.
Cottage Gardens
3995 Emerald Dr, Petaluma
707-778-8025
Open Everyday 10-5
www.cottagegardensofpet.com
Specialty growers focusing on Perennials, Roses, Clematis, Rhododendrons, Grasses, Succulents and Edibles, as well as offering a wide selection of Pottery, Garden Furniture, Trellises and Gifts.
Emerisa Gardens
555 Irwin Ln, Santa Rosa
707-525-9644
Open Mar-Oct:
Tue-Sat 9-5, Sun 10-4
www.emerisa.com
A family owned retail nursery that grows over 2000 different varieties of plants, ensuring a beautiful, drought tolerant, deer resistant and habitat friendly plant palette that is sustainable too!
Greenman Nursery
2833 Old Gravenstein Hwy, (West of Todd Rd.), Sebastopol
415-710-2562
Open Fri-Mon 10-5 or by Appointment.
Old school organically grown fruit trees, berries, grapes, herbs, and veggies- over 100 varieties. With large demonstration gardens of native, succulents, grasses and large specimen trees.
Harmony Farm Supply
3244 Hwy. 116 N, Sebastopol
707-823-9125
www.harmonyfarm.com
Open Mon- Sat 7:30-6pm and Sun 8:30-5pm.
Committed to selling quality products Harmony Farms does not sell any synthetically compounded pesticides or fertilizers and believes that food, flowers and ornamentals can be grown organically without the use of toxic materials.
Luther Burbank Experiment Farm – Gold Ridge
7777 Bodega Ave., Sebastopol
707-829-6711
www.wschsgrf.org
Plant Sales every Weds 9-12
Open all year for self-guided tours. Docent led tours: call to reserve.
Mostly Natives
27235 Highway One, Tomales
707-878-2009
Wed-Sat 10-4, Sun 11-4
www.mostlynatives.com
A small retail nursery located in the northwest corner of Marin County, with a wide variety of native and non-native perennials, grasses, shrubs, and trees, along with certified organic veggie starts in both spring and fall.
North Coast Native Nursery
2700 Chileno Valley Rd., Petaluma
707-769-1213
www.northcoastnativenursery.com
Located in Chileno Valley, this nursery propagates regional California natives for water wise and sustainable landscapes, wildlife habitat and hedgerows, living roofs, and edible gardens. Seasonal hours and directions on website.
Occidental Arts & Ecology Center
15290 Coleman Valley Rd, Occidental
707-874-1557
www.oaec.org
Propagating a wide variety of native, drought tolerant, edible and medicinal plants, sales occur in throughout the year in April, May, and August. Check the web site for dates and times for sales, other tours and classes.
Urban Tree Farm Nursery
3010 Fulton Rd, Fulton
707-544-4446
www.urbantreefarm.com
Mon & Wed-Sat 8-5, Sun 10-5
Countless varieties of shrubs, grasses, vines, fruit and ornamental trees to consumers and landscapers. We deliver throughout the Greater Bay Area.
How to Harvest More Rain in the Landscape with Swales
A swale is a ditch that is dug on contour, meaning that it runs perfectly level across the landscape.
 Swales are a great way to slow, spread and sink excess rainwater that would normally runoff.
Swales can be as big or as small as you like and should always have a spillway designed to shed excess water.
When a swale is dug out, the excavated soil is put on the downhill side of the ditch, forming a berm. This berm should be planted so that the roots help strengthen and hold the berm in place.
Swales harvest water which sheets downhill in a rainstorm and they can also be used to harvest water from downspouts or curb cuts.
Swales can be left as an open ditch or filled in with mulch.
Using an A-Frame to Measure Contour Lines
An A-Frame Level is a low-tech device that consists of three boards and a string with a weight on the end. You can use it to find contour lines.
To make an A-Frame Level
- Attach three boards in the shape of a capital “A” with two equal length legs
- Attach a string to the top of the “A” and hang a weight on the other end.
- Make sure the string extends beyond the crossbar of the “A”
 To Calibrate an A-Frame Level
- Place the A-Frame on a level (or nearly level) surface and mark the spot where the two legs rest
- Let the string hang down freely until it comes to rest against the crossbar
- Mark the spot where the string rests against the crossbar
- Flip the A-Frame around so that the legs are in the opposite spots
- Let the string hang freely and mark where it rests against the crossbar
- The midway point between the two marks on the crossbar is the level line
- Mark this level line with a big mark.
Using the A-Frame Level
- Now that it’s calibrated, you can use the A-Frame to find contour lines.
- Mark the location of one foot of the A-Frame and move the other foot around until the string hangs against the level line.
- Mark where the second foot rests
- Swing the first foot around until the string rests against the level line, and mark where the foot rests.
- Continue to walk the A-Frame across the landscape, marking each spot with a flag or stick.
Calculating Appropriate Swale and Rain Tank Size
The first thing that needs to be determined in swale design is how much rainwater will be diverted into it. If rain water is coming from the roof surface through a disconnected down spout, then rainfall in gallons can be predicted with the following equation:
A x R x 7.5 gal/ft3 = Total Rainwater (gal)
- A = Catchment area in square feet (length X width)
- R = Rainfall in feet = Rainfall in inches / 12
- There are about 7.5 gallons per cubic foot
Remember: You can collect 600 gallons of water per inch of rain falling on 1,000 square feet of catchment surface.
Once the number of gallons entering the swale has been determined, you can use the following equation to determine how big your swale needs to be to hold the majority of the water during a high flow rain event:
Total Rainwater = A x R x 7.5 gal/ft3 vs.
Swale Volume (gal) = 0.5 depth (feet) x width (feet) x length (feet) x 7.5 gal/ft3
- A = Catchment area in square feet (length X width)
- R = Rainfall in feet = Rainfall in inches / 12
- There are about 7.5 gallons per cubic foot
- Factor in the number of inches received in a high flow event
Remember to take the results of your Soil Composition and Percolation Test into account, as these will affect the swales water holding capacity, if the soils are slow draining.
A few more things to note about sizing your swales. Most residential properties will not have enough surface area to accommodate a high flow event, so take the swale volume calculation with a grain of salt. Regardless, all swales will need to have an overflow option to allow for excess water to leave the system without compromising the integrity of your swales (i.e. erosion).
Sheet mulching is simple, natural, and effective for getting rid of your lawn and/or weed issues
Sheet Mulching is a landscaping method used to build soil, prevent weeds, and retain water. It’s sometimes referred to as a mulch lasagna because a compostable weed barrier such as cardboard, compost, and mulch are layered over lawn (or any soil area). Sheet mulching is a variation on nature’s way of building soil by accumulating and breaking down organic matter from the top down, and it creates a prime canvas for planting. We’ve recently altered our own sheet mulching process to be better in line with FireSafe Marin’s best practices for creating defensible space. With that in mind, we only use arbor mulch, we do not spread mulch in Zone 0 (0-5ft from the home), and in some cases we only spread 2” of mulch. That said, using too little mulch can actually encourage weed growth, so it is up to you to determine your fire risks and the level of weed suppression that you need on your site. A Washington State University Extension paper on using arbor mulch in the landscape recommends 4-6″ for weed suppression.
Benefits of Sheet Mulching:
- Saves 12-25 gallons of water per square foot per year compared to a traditional lawn, depending on the type of plants used. Sheet mulching the average 1,000 ft2 lawn could save between 12,000 and 25,000 gallons per year!
- Suppresses weed growth
- Reduces labor and maintenance costs
- Improves nutrient and water retention in the soil and improve soil structure
- Encourages favorable soil microbial activity and worms
- Improves plant vigor and health, often leading to improved resistance to pests and diseases
Step 1: Mow, Edge, Convert Sprinklers 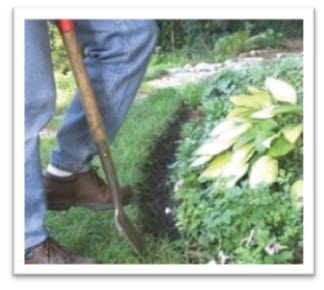
- Knock down or mow existing vegetation so that it lies flat. Remove only woody or bulky plant debris. Other organic matter can be left in place and will add nutrients to the soil.
- Edge the site, especially along hardscaping like sidewalks. This catches mulch spill over and prevents grass and weeds from reemerging around the edges. Edging should be ~5” deep (but can be more shallow around the base of trees) and should gradually slope back to the level of the rest of the landscape.
- Cap any sprinkler heads and convert one or more sprinkler heads to drip line irrigation if plants will be installed. Be sure to use a filter (often found inside the sprinkler conversion kit) and a pressure reducer to bring the pressure down to 30 psi.
Step 2: Plant Large Plants
If you have large plants (5 gal. or bigger), plant them before sheet mulching and then layer over the planting area, being careful to avoid piling compost or mulch around the trunk of the plant. Note: it is okay to sheet mulch several months before planting and then plant large plants later.
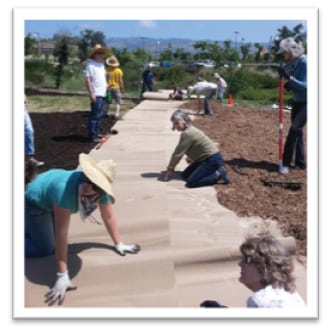 Step 3: Lay down the Weed Barrier
The first layer, an organic weed barrier, breaks down with time. The barrier should be permeable to water and air. Recycled cardboard (available from bike stores, large appliance stores, Sonoma Compost, and a multitude of other sources) is best, but a thick layer of newspaper will also work. Two or three layers may be required to achieve an adequate thickness, especially if using cardboard rolls or newspaper. However, if the weed barrier is applied too thickly, the soil can become anaerobic. The weed barrier works by blocking light, so be very careful to avoid tears or holes. Overlap pieces at least 6” to completely cover the ground without any breaks, except where there are established plants you want to save. Work in small sections so that the wind does not blow your weed barrier away before you can weight it down with compost and mulch.
Step 4: Add a Compost Layer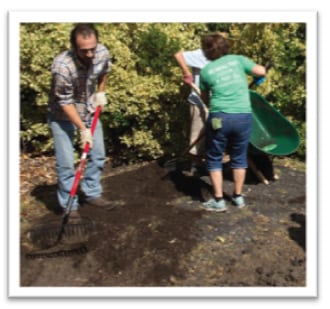
Jump start the decay of weeds and grass by adding compost or manure at the rate of about 50 lbs/100 square feet (1”-2” deep). Add any additional amendments needed, as indicated by a soil test. Optional: Soak with water to start the natural process of decomposition, especially if you’ll be planting soon.
Step 5: Add Mulch
Layer arbor mulch at least 2” thick. For best weed suppression, use 4-6″ of mulch. Leave a generous opening for air circulation around the root crown of plants.
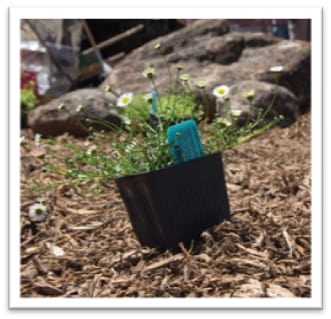 Step 6: Plant
Punch a hole or cut an X in the cardboard and place plants in the soil under the sheet mulch. Be sure the roots are fully in the soil, not just the mulch. Important note: Planting in a newly sheet mulched project can result in reemerging grass/weeds. It is advisable to predetermine your plant layout and remove the grass/weeds from the desired planting location. Alternatively, you can wait a season or more for the grass/weeds to compost before planting.


